JumpCloud
Overview
Before using this document, read the general Mixpanel SSO set-up instructions.
Configure SSO in Mixpanel
Follow the general SSO set-up instructions.
Make sure to collect your postback URL and successfully claim your domain.
Configure the Mixpanel App in JumpCloud
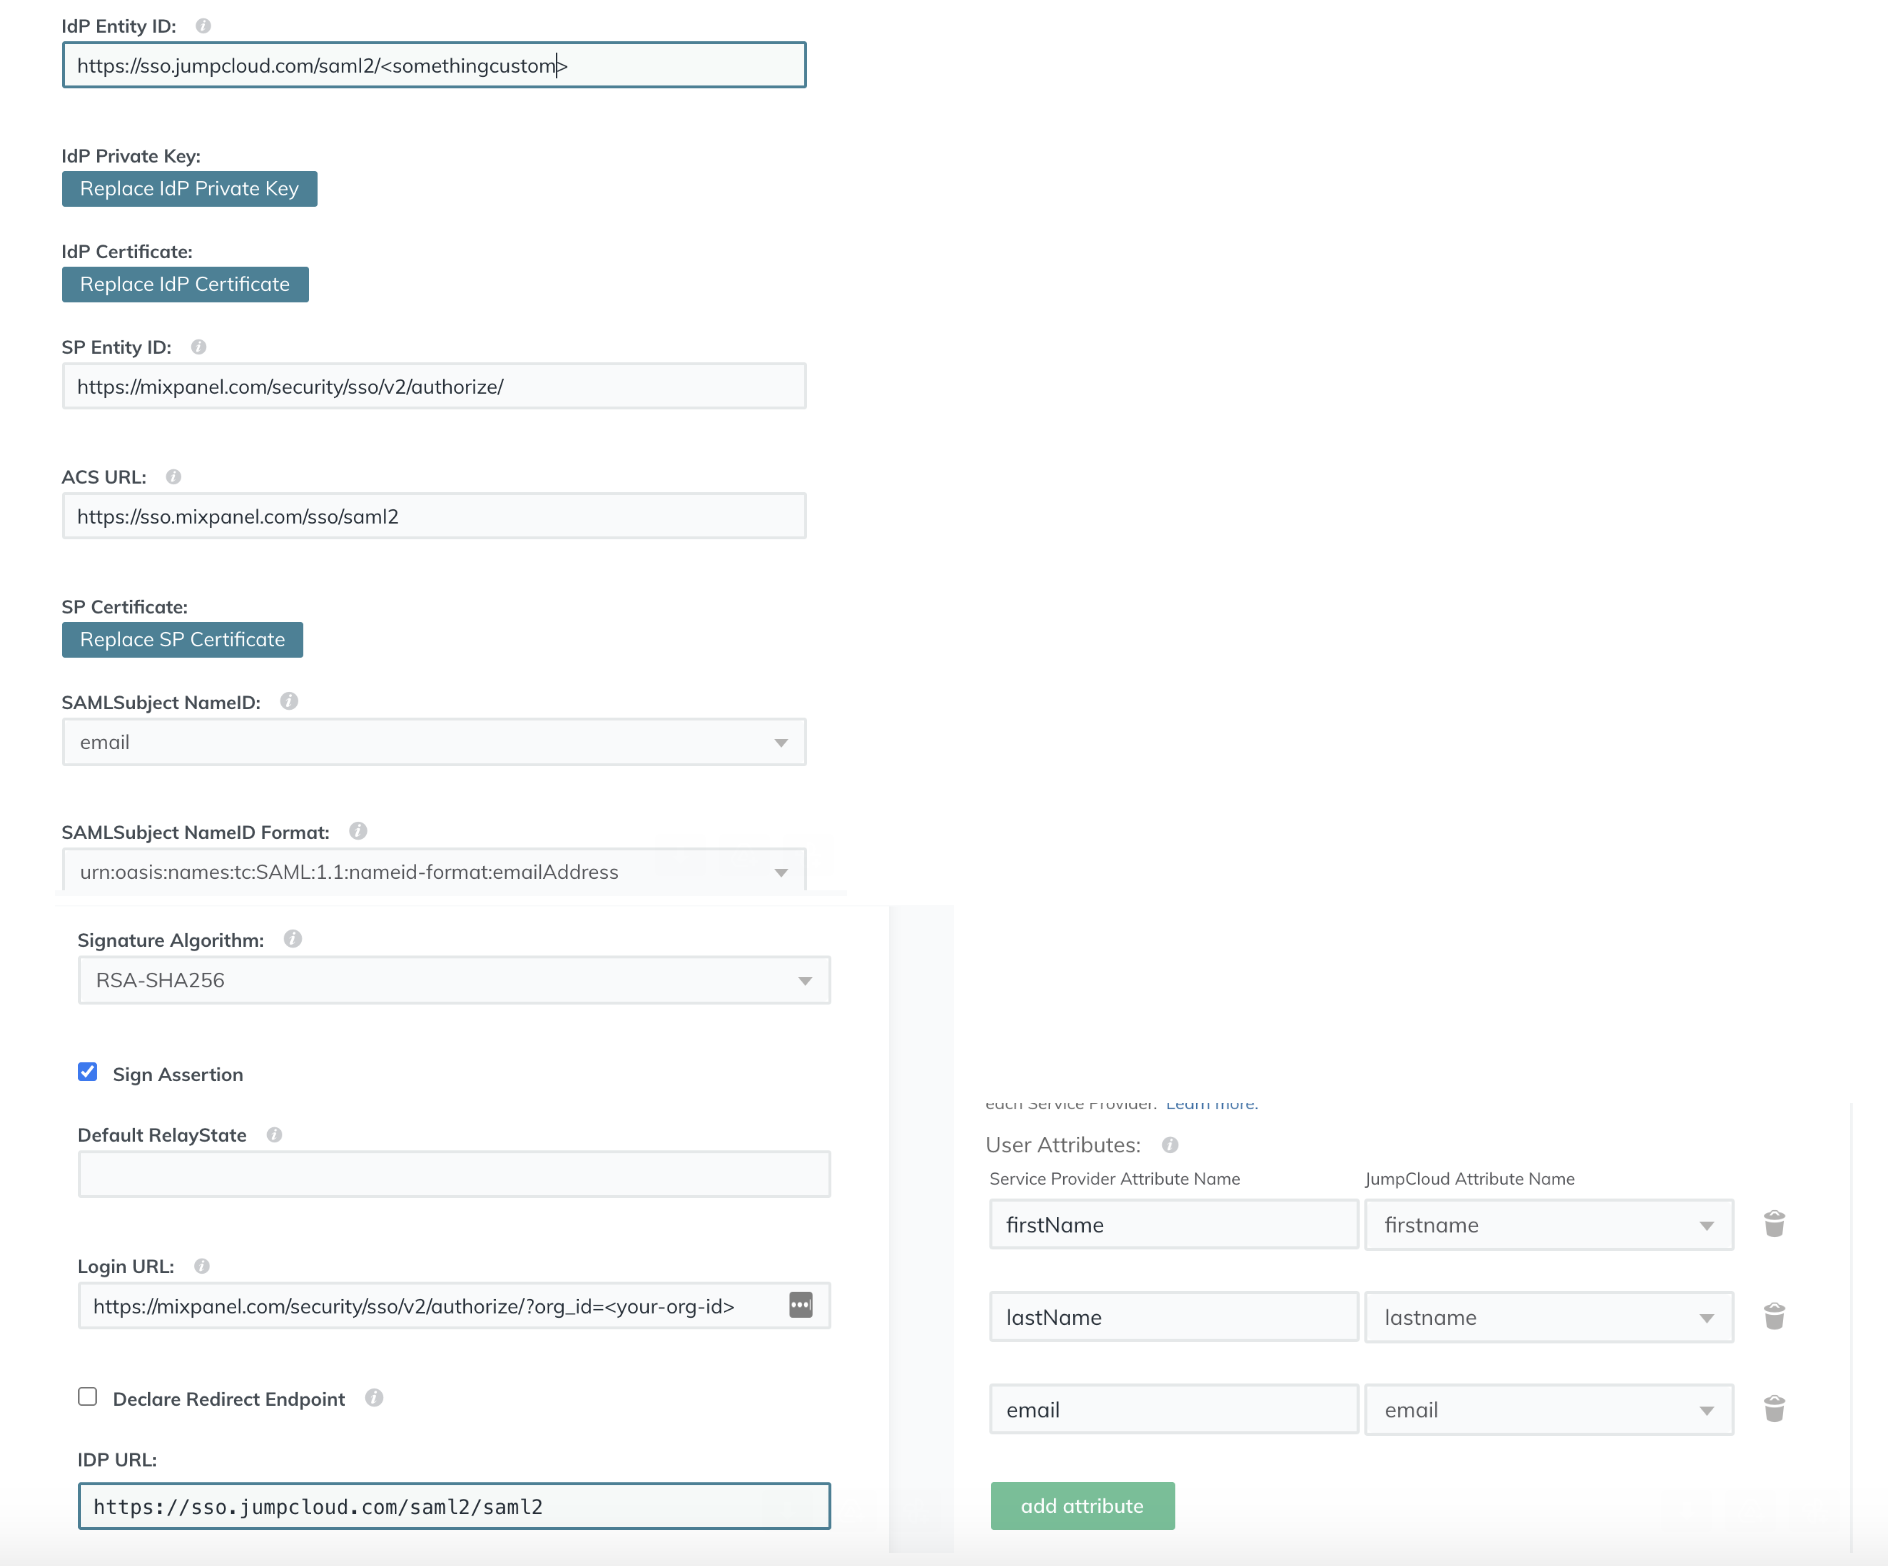
Go to JumpCloud and create a custom application with the following values:
SP Entity ID: https://mixpanel.com/security/sso/v2/authorize/ (opens in a new tab)
ACS URL: https://sso.mixpanel.com/sso/saml2 (opens in a new tab)
Login URL: <Mixpanel's Postback URL from your org settings>
IDP Entity ID: The value itself doesn't matter much but it must be unique across all Mixpanel customers and must also be a URL, so something like https://sso.jumpcloud.com/saml2/ (opens in a new tab)
IDP URL: You will paste this into Mixpanel's Identity Provider Sign-in URL field
You will also want to download the IDP certificate to upload into Mixpanel
Make sure to pass through the attributes: email, firstName and lastName. Only email is required but the other two are useful if you want to provision new users with SSO via IDP Managed Access.
Here is a screenshot of an example setup:
Optionally toggle “Require Users to Log In using SSO” to prevent your users from using a username and password to log in. Click Enable. Organization owners and admins will still be able to log in using username and password if SSO is not set up correctly.
SCIM
Use SCIM with JumpCloud at your own risk. There have been problems reported with the JumpCloud setup process hard deleting users unexpectedly.
Was this page useful?