SSO
Overview
You can use Single Sign-On (SSO) to access Mixpanel. You must be on a Mixpanel Enterprise account and use an identity provider or a custom SAML implementation in order to use SSO with Mixpanel.
Access SSO Settings
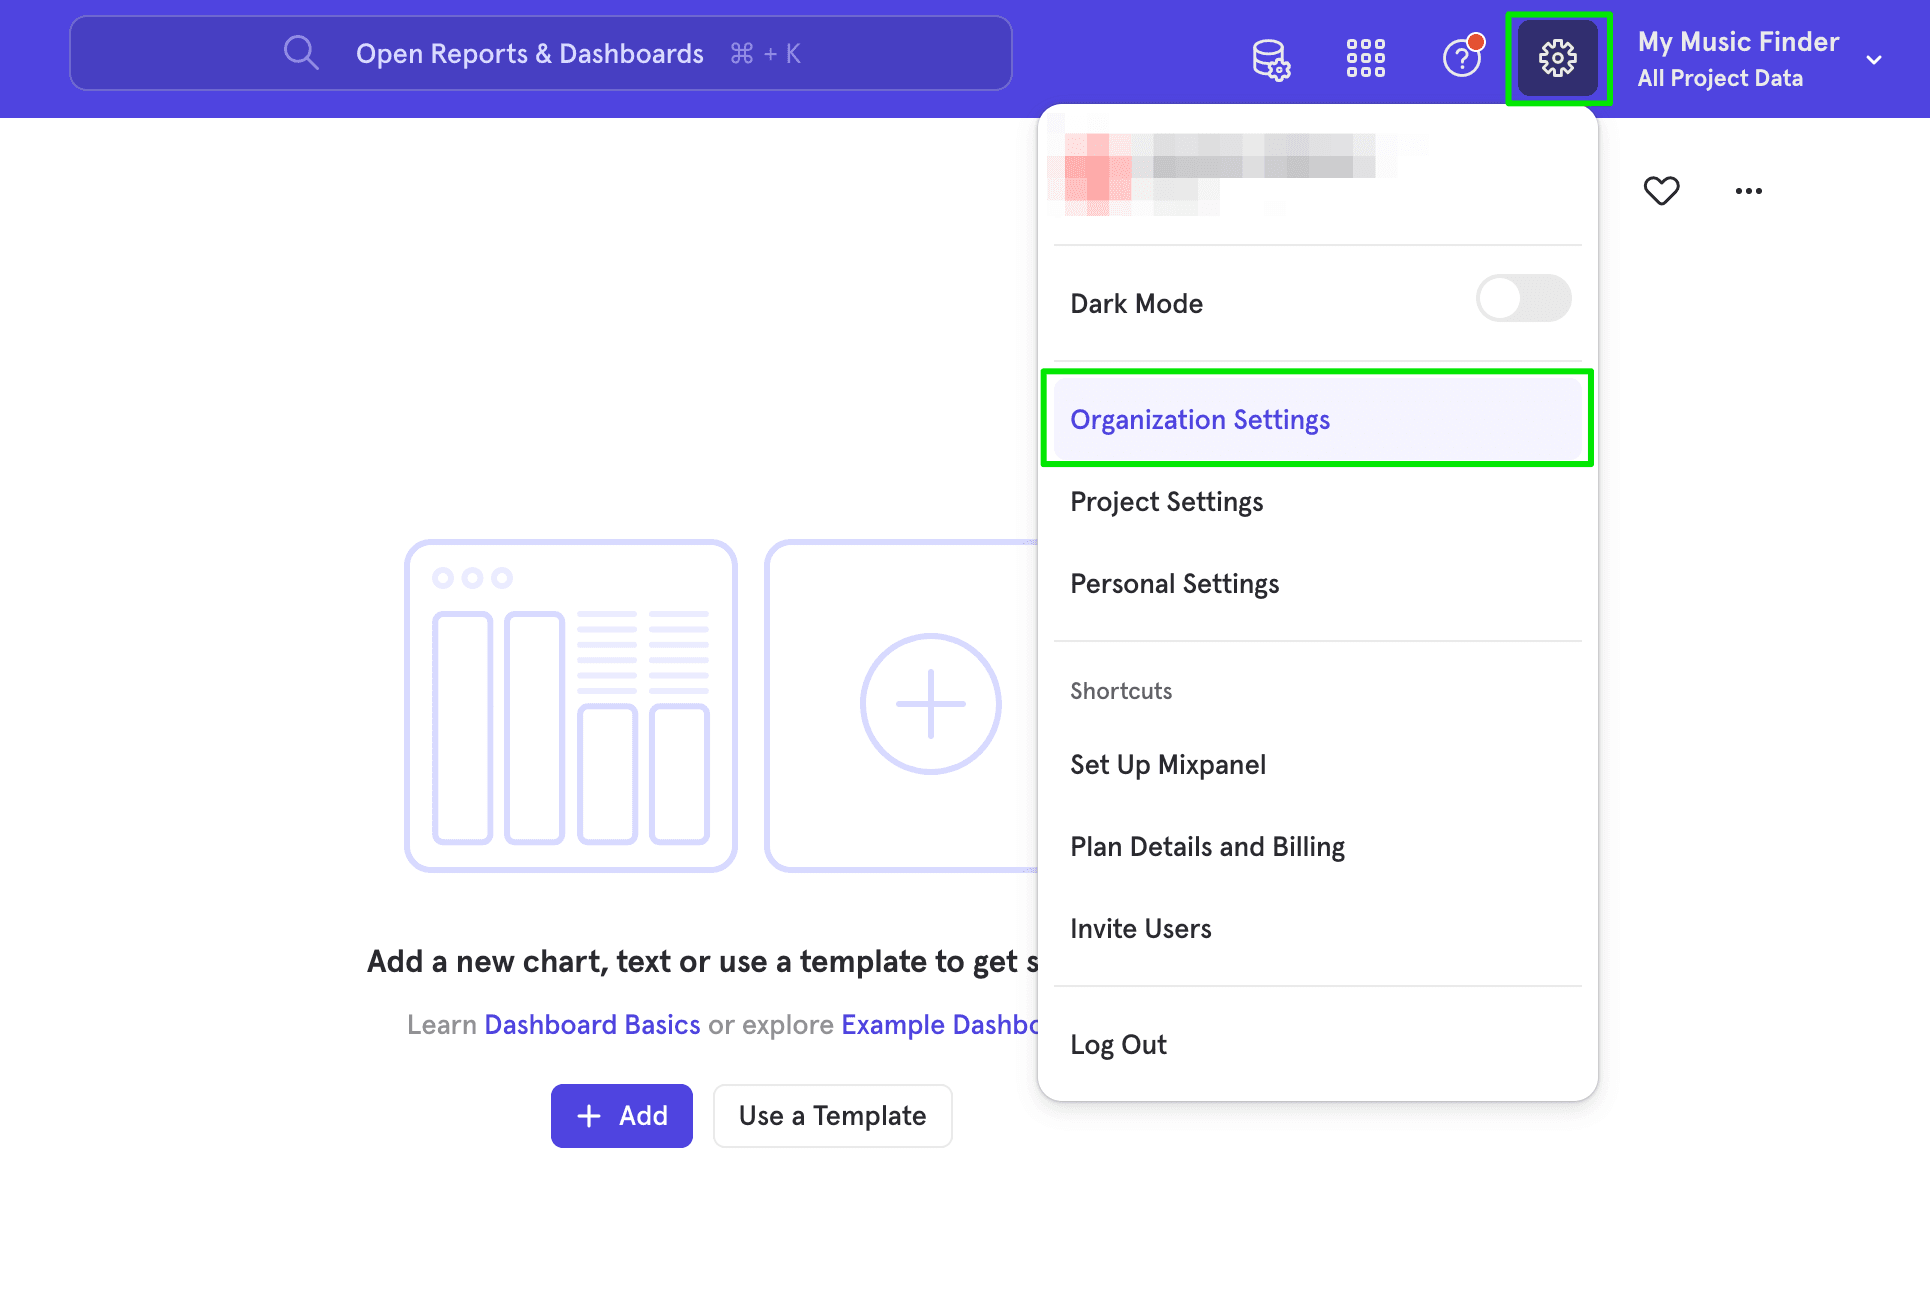
To access SSO settings in Mixpanel, navigate to your Organization Settings located under your name in the top navigation.
Require Users to Log In Using SSO Optionally toggle “Require Users to Log In using SSO” to prevent your users from using a username and password to log in. Click Enable. Please note that organization owners and admins will still be able to log in using username and password in the case that SSO is not set up correctly. Do note that external users who were invited to projects will still be able to log in using username and password.
Claim a Domain
Claiming a domain will add security to an SSO implementation by only allowing members with a claimed domain in their email address to access Mixpanel. SSO only works on domains that are claimed.
To claim a domain, add a TXT record to your domain’s DNS records with a verification key provided by Mixpanel. The verification key is available after you claim a domain from your Organization Settings.
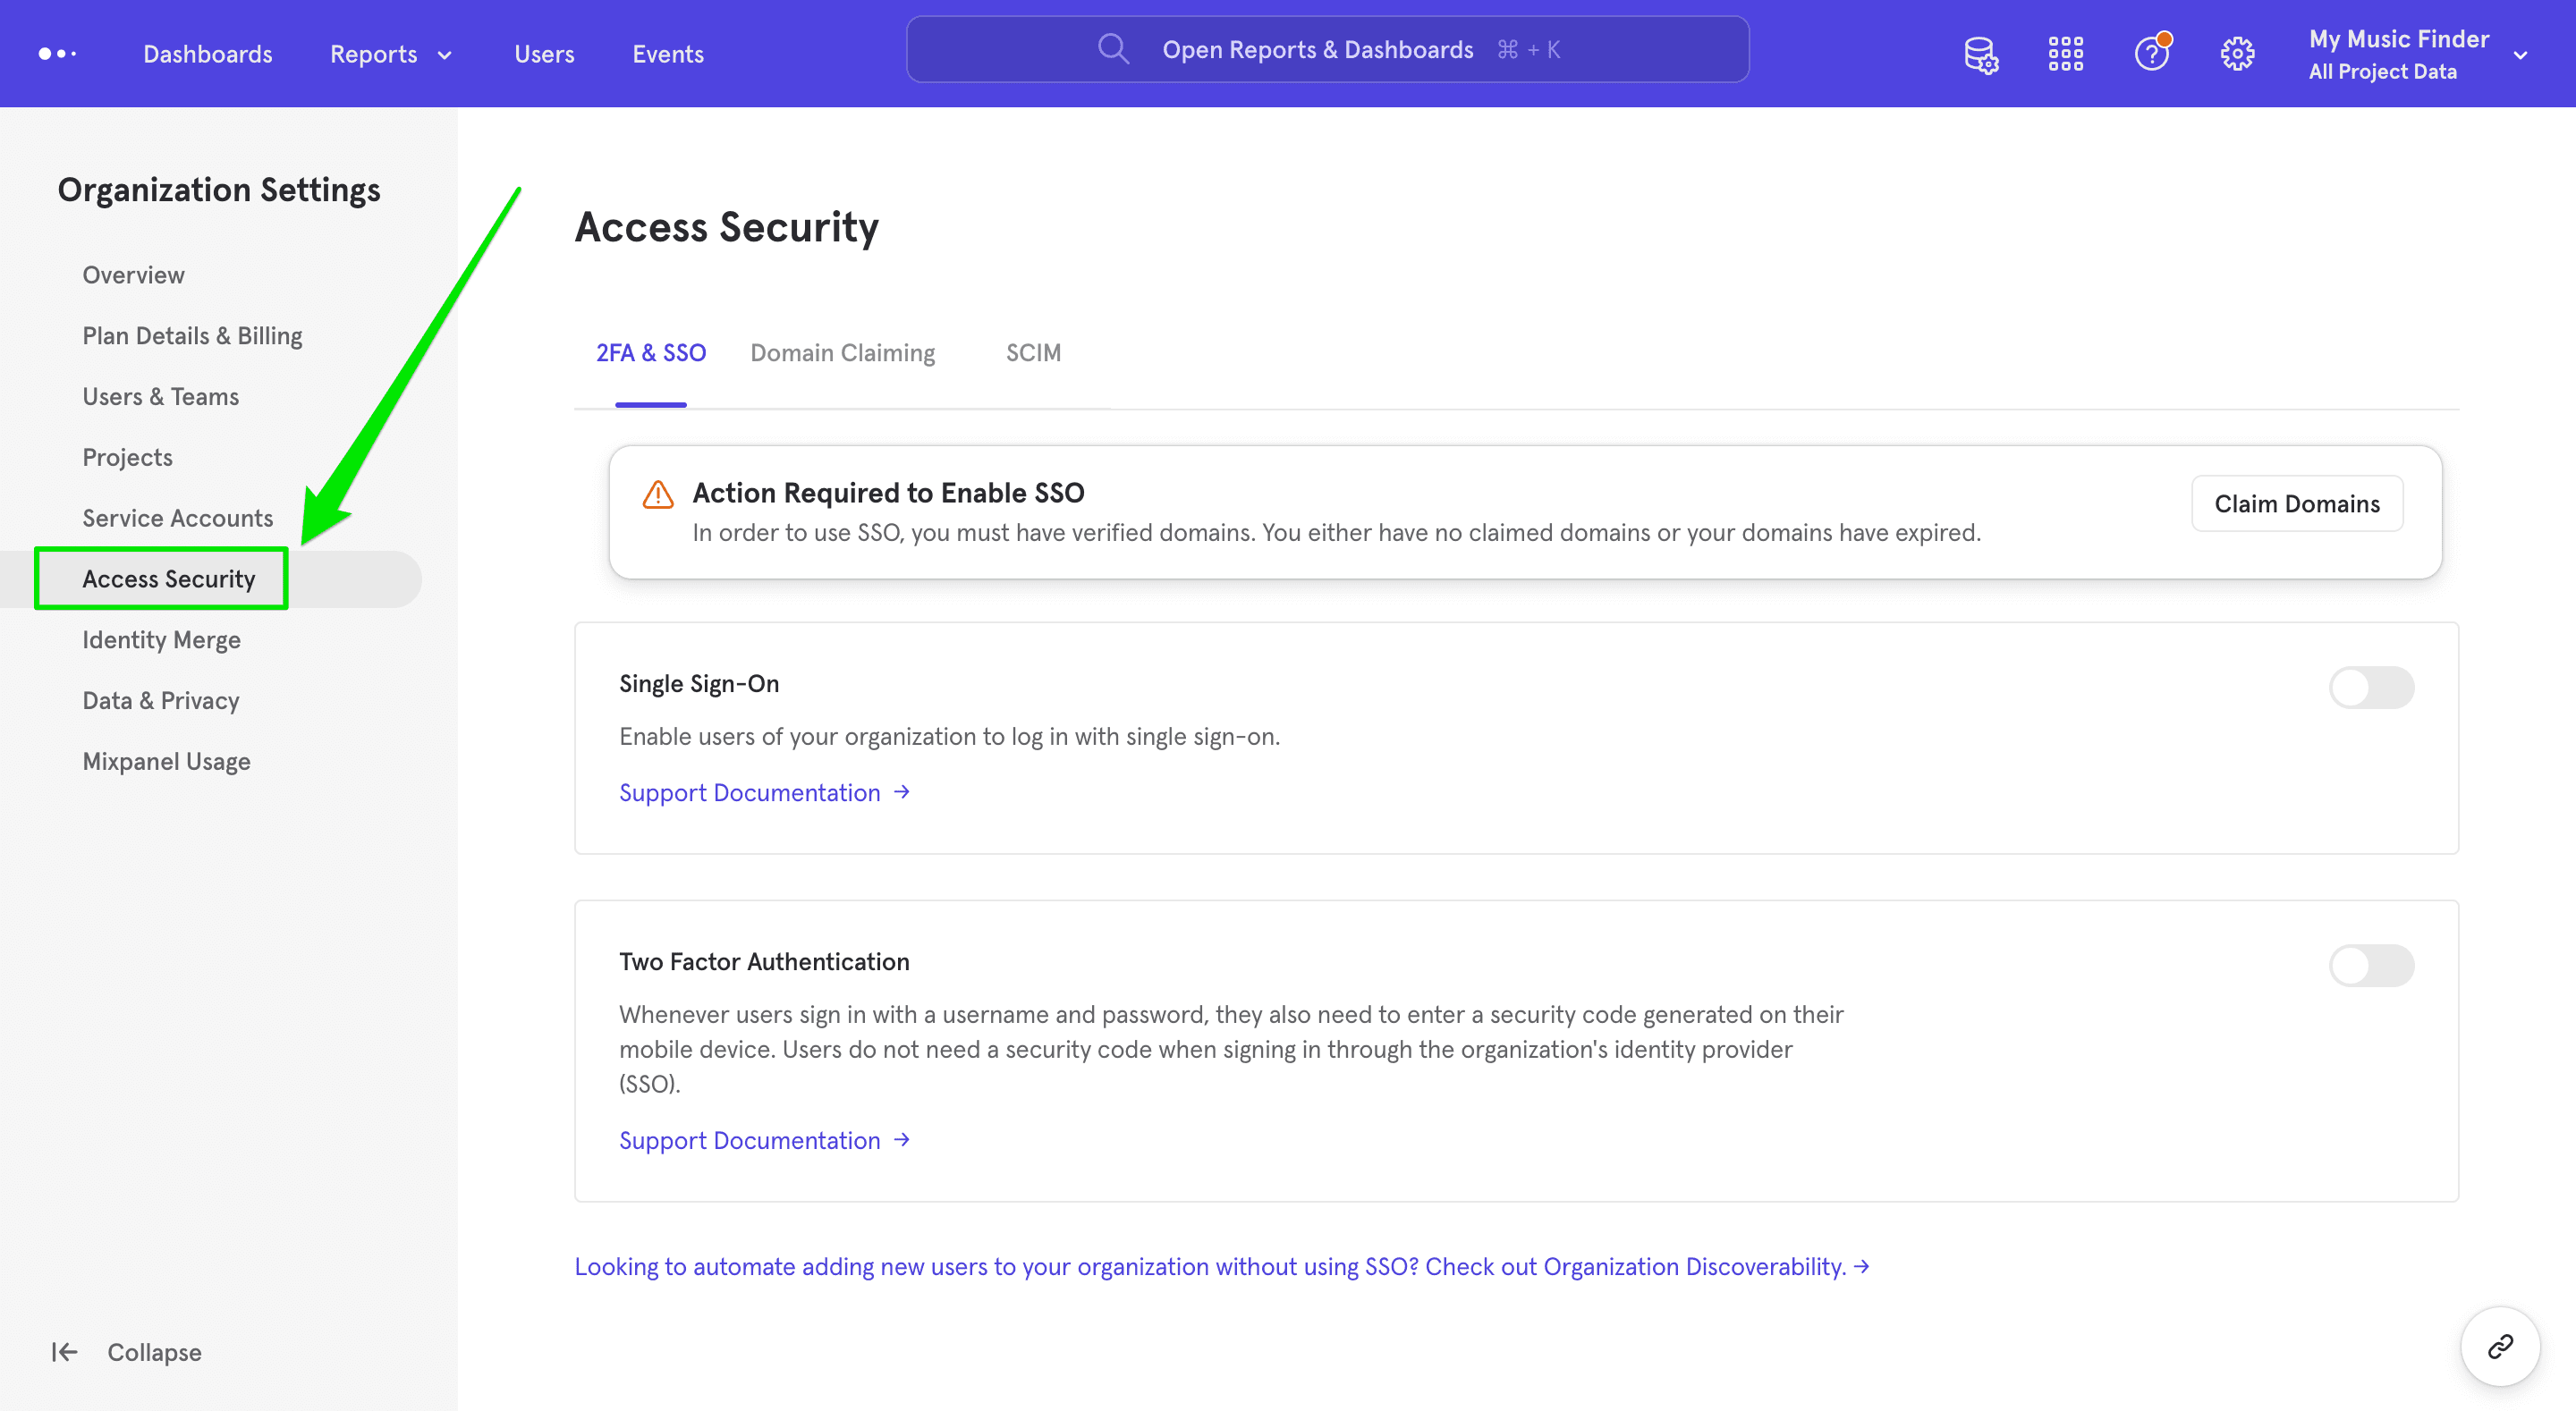
Generate Verification Key by Claiming Domain To claim a domain, click Access Security in your Organization Settings.
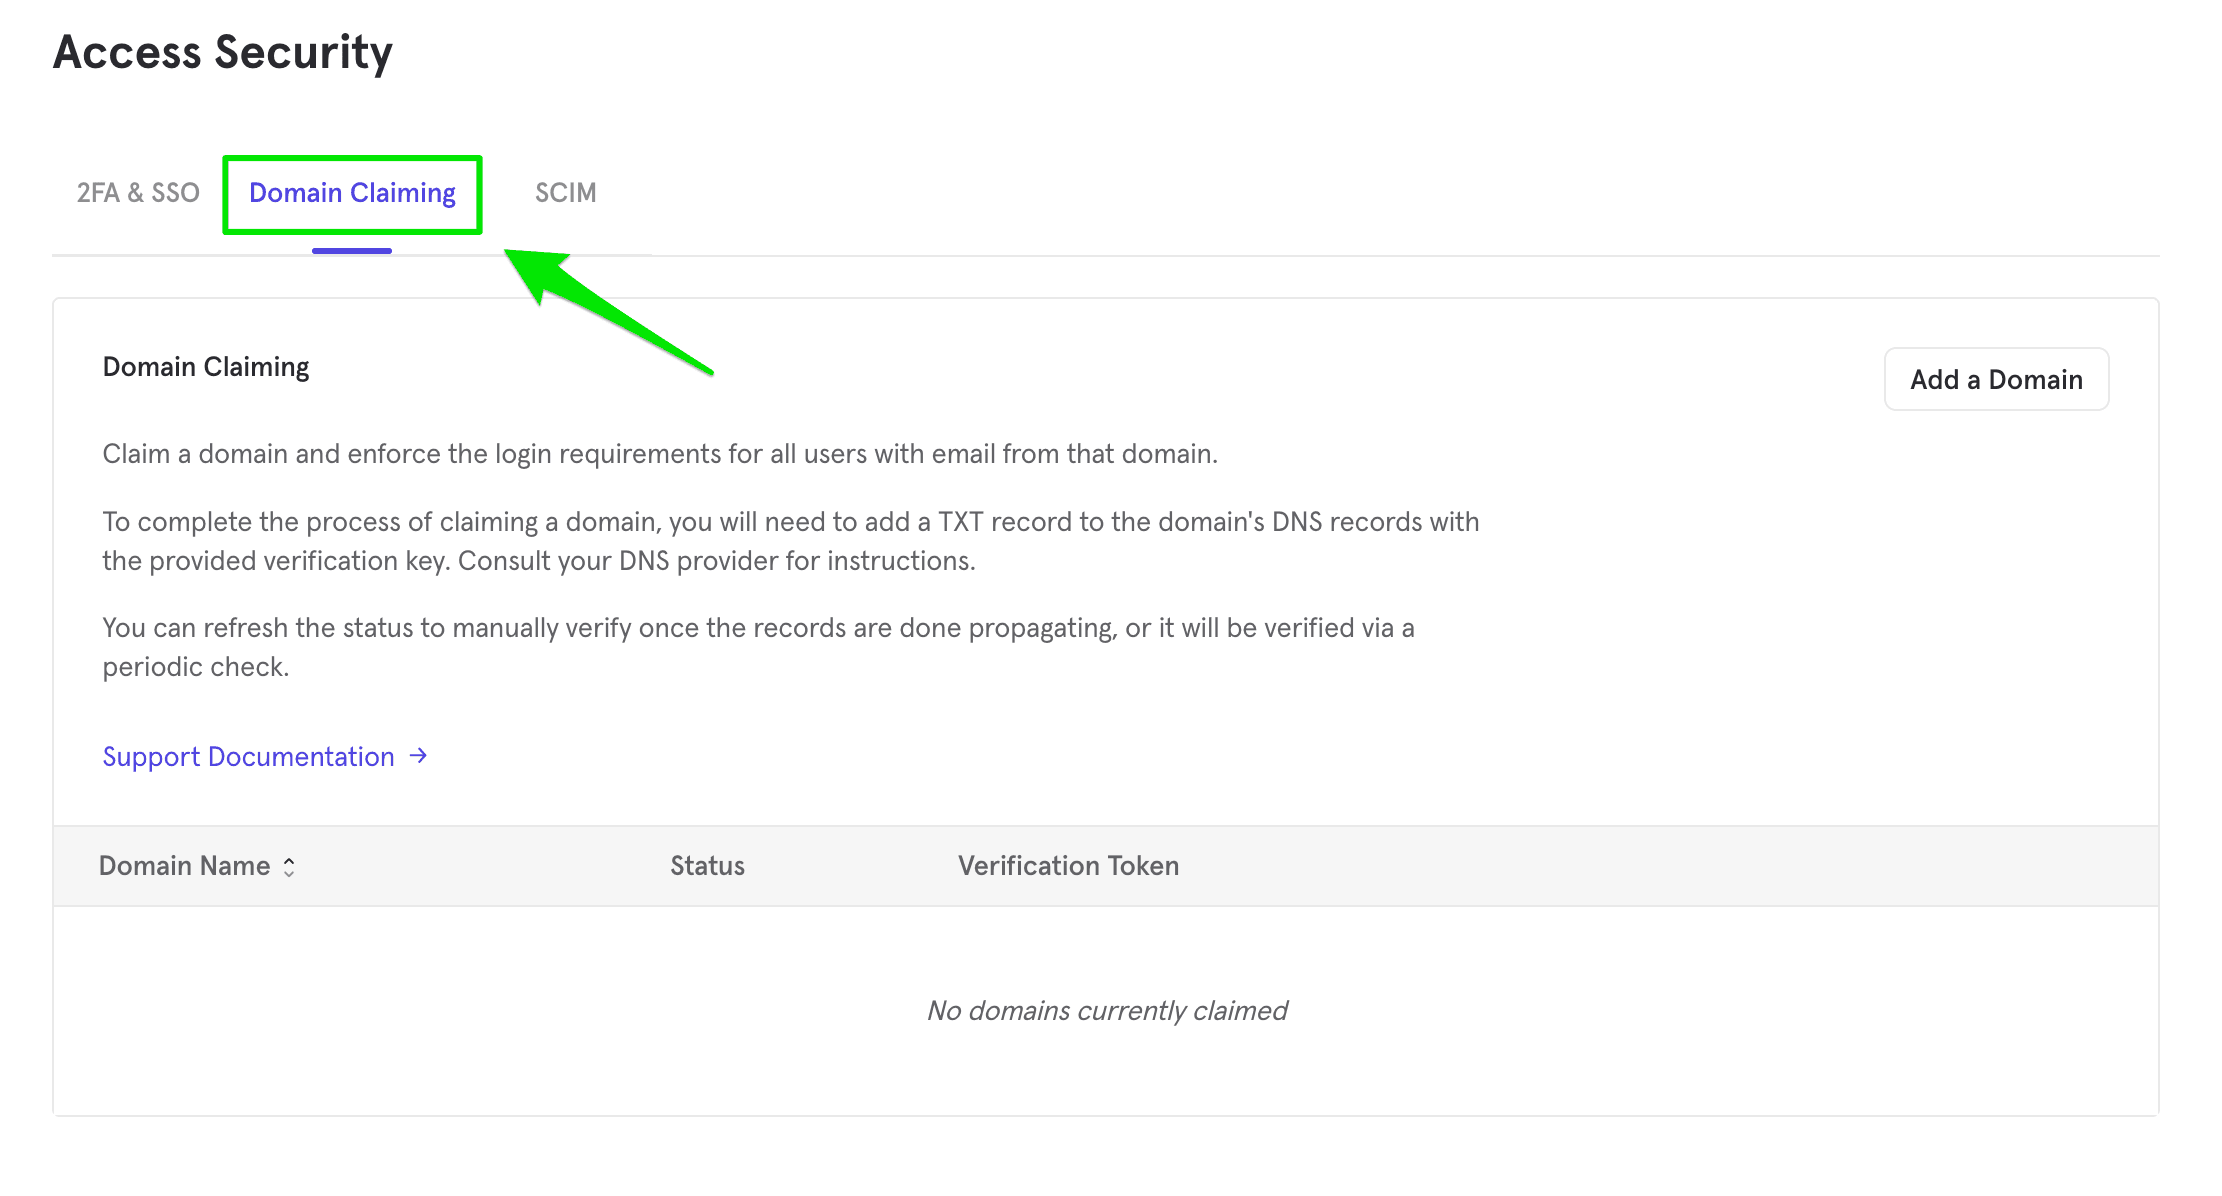
Click Domain Claiming in the Access Security menu.
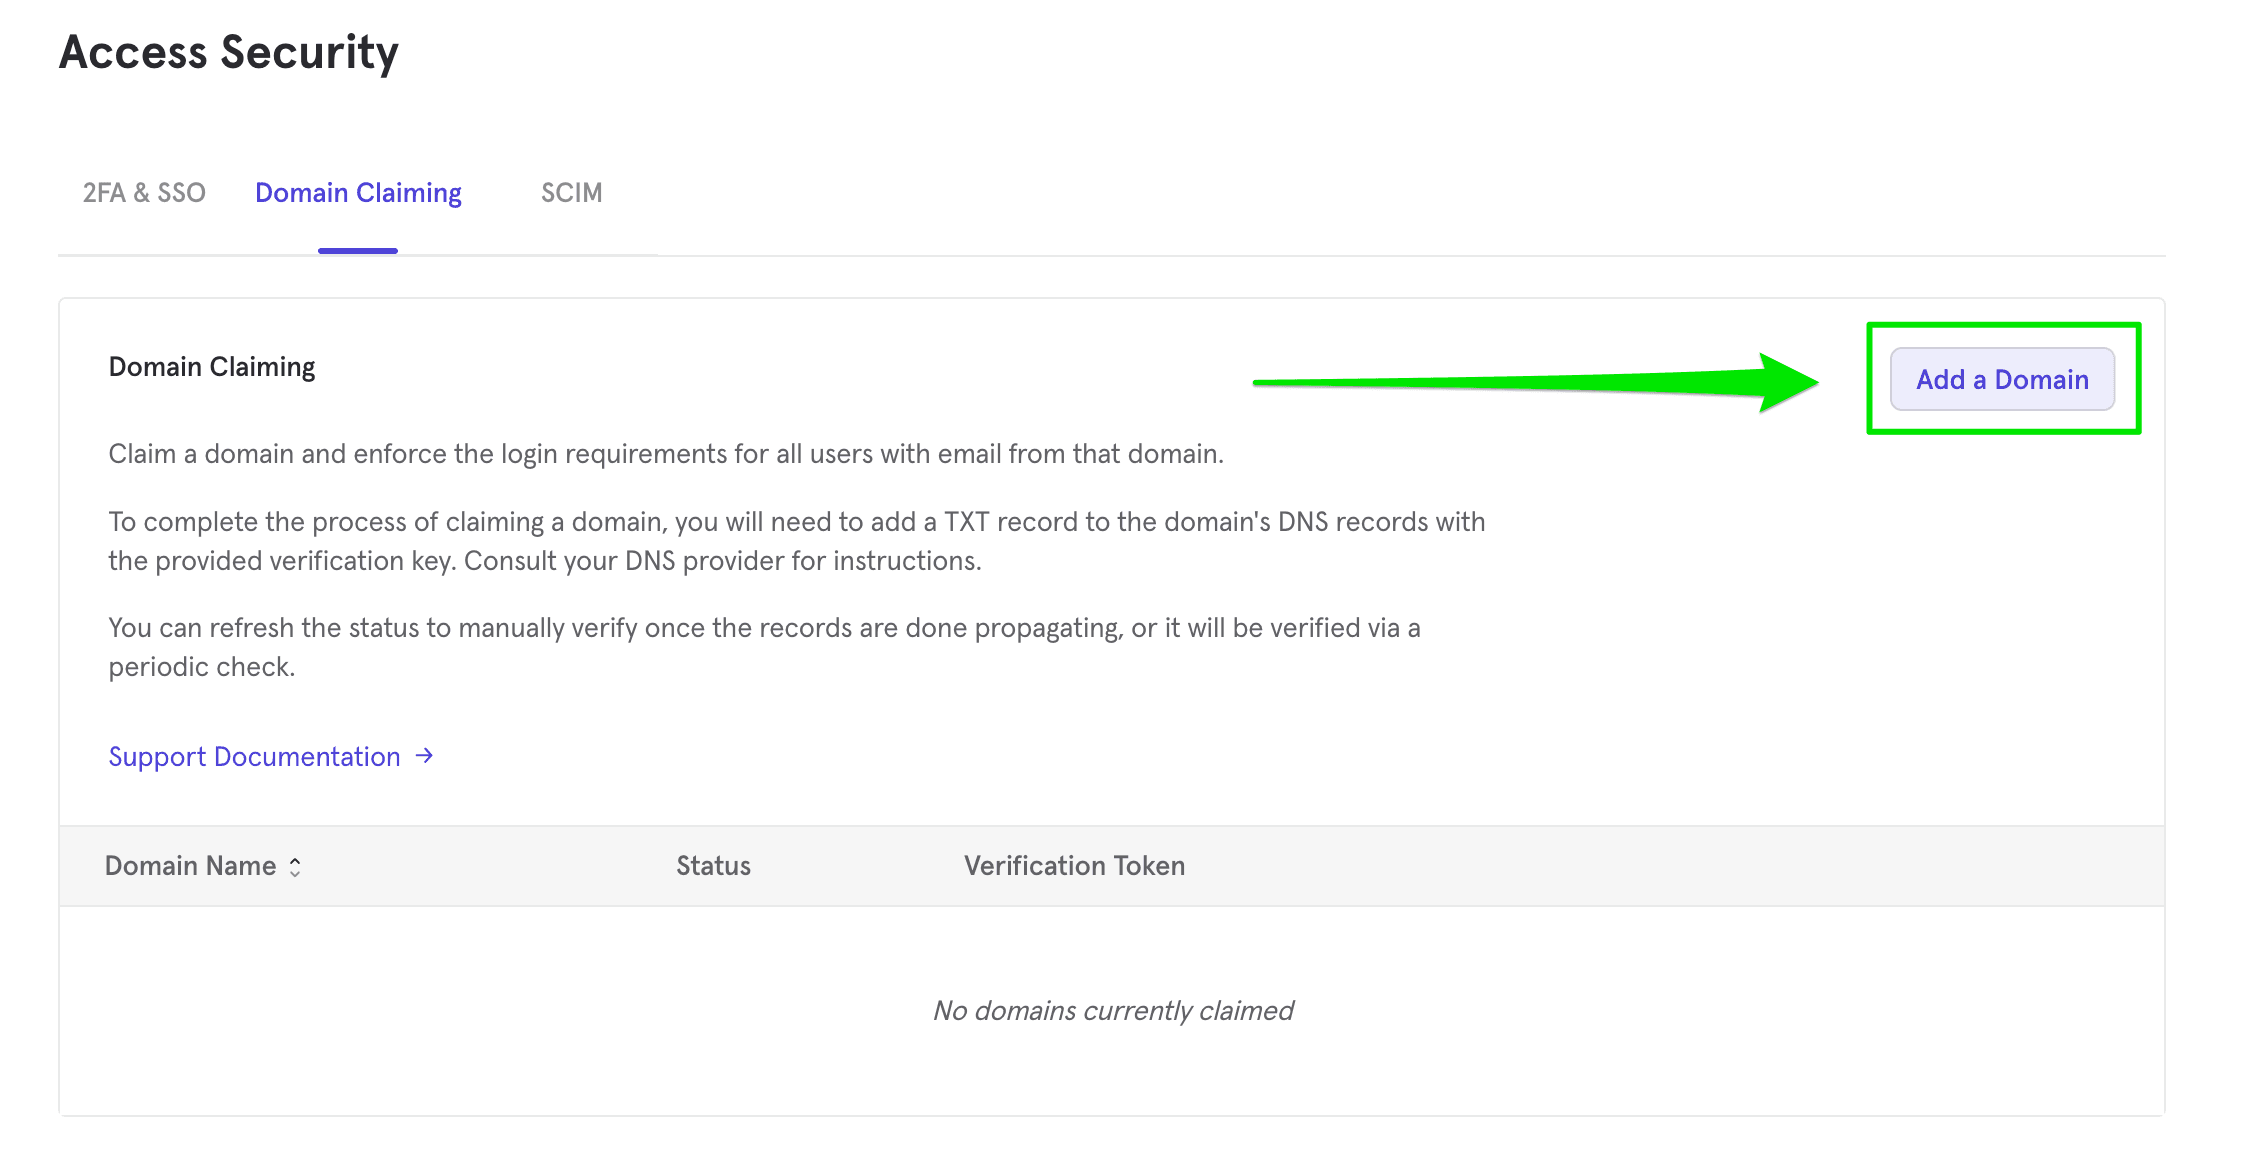
Click Add Domain found in Domain Claiming menu. You will be prompted to enter your Mixpanel password.
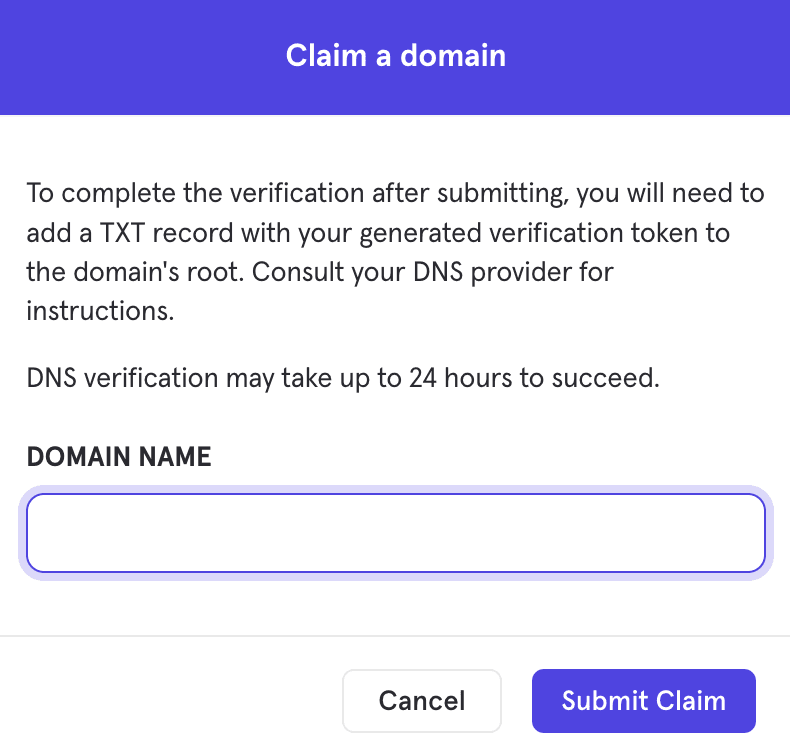
Enter the domain you wish to claim in the pop-up modal. Click Submit Claim.
Check Verification Status
-It may take up to 24 hours for Mixpanel to verify ownership after you claim a domain.
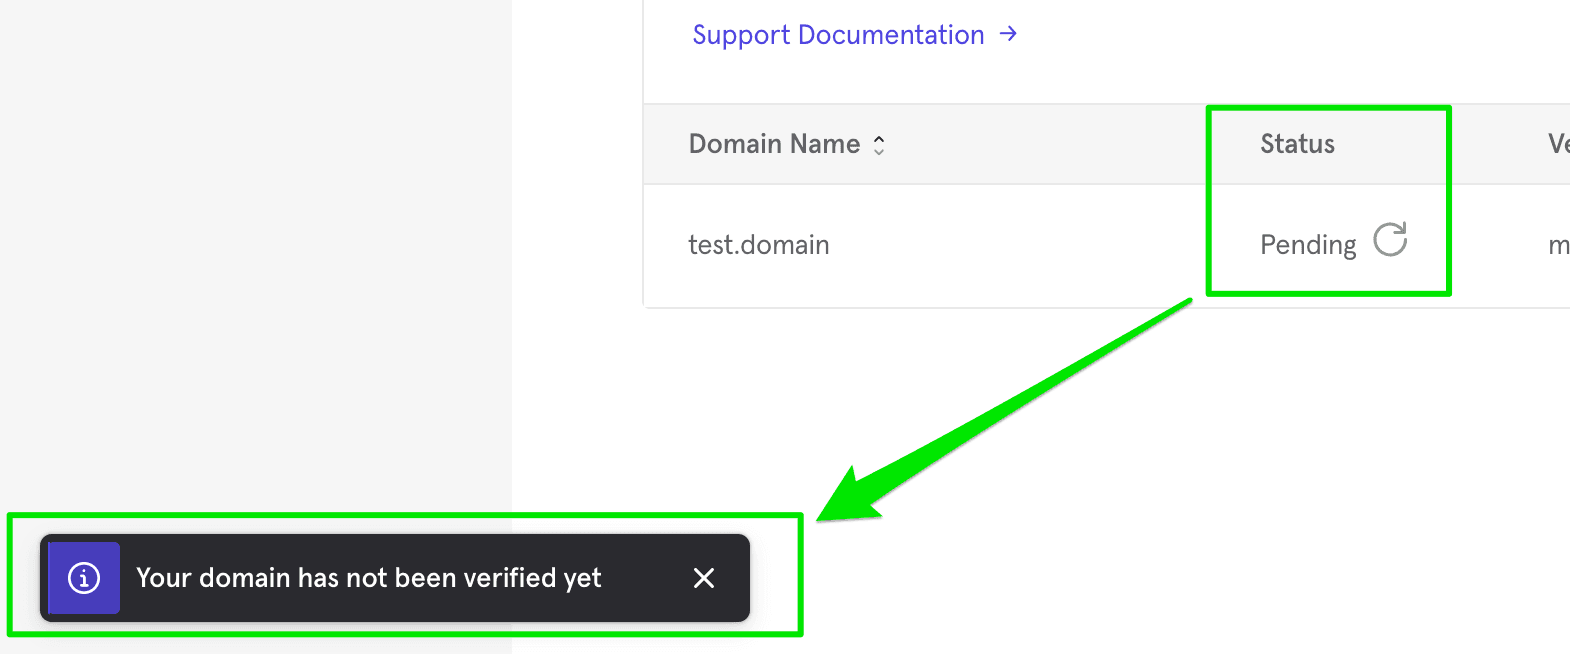
The claimed domain appears in the Domain Claiming menu. It will list as pending until it is successfully verified.
It will be indicated as verified after Mixpanel verifies the domain.
Add Verification Token to your DNS
The verification token is available in the Domain Claiming menu after you claim a domain. Use the token as part of the TXT record that you add to your domain’s DNS record.
Add mixpanel-domain-verify=<your-token> as the TXT record.
Note that you will need to leave the token in your DNS records permanently or the domain will unverify after a week. Only remove the token for domains you no longer wish to use SSO with.
Set Up Your IDP
You must configure your Identity Provider (IDP) to connect to Mixpanel in order to use SSO if you are not using custom built SSO. This requires that you directly configure your SSO settings.
Okta
Setting up SSO with Okta requires that you configure a custom app in Okta. Follow these instructions to configure a custom application.
One Login
One Login only requires that you get the Postback URL. The application is in the Onelogin application store as "Mixpanel" and supports autoprovisioning. You will just need to copy a SCIM token from Mixpanel into the provisioning token box in the Onelogin app. You can learn how to generate a token here.
G-Suite
Google has an official integration with Mixpanel with instructions here. (opens in a new tab) Unfortunately we do not have an autoprovisioning integration with G-Suite so you will need to rely on Just In Time Provisioning.
Azure
There are instructions here to set up SSO with Azure. Azure also has an auto-provisioning integration with Mixpanel which you can find more info for here. (opens in a new tab)
Other IDPs
It is possible to set up Mixpanel SSO with IDPs not listed above. Contact support (opens in a new tab) for further assistance in such cases.
Postback URL
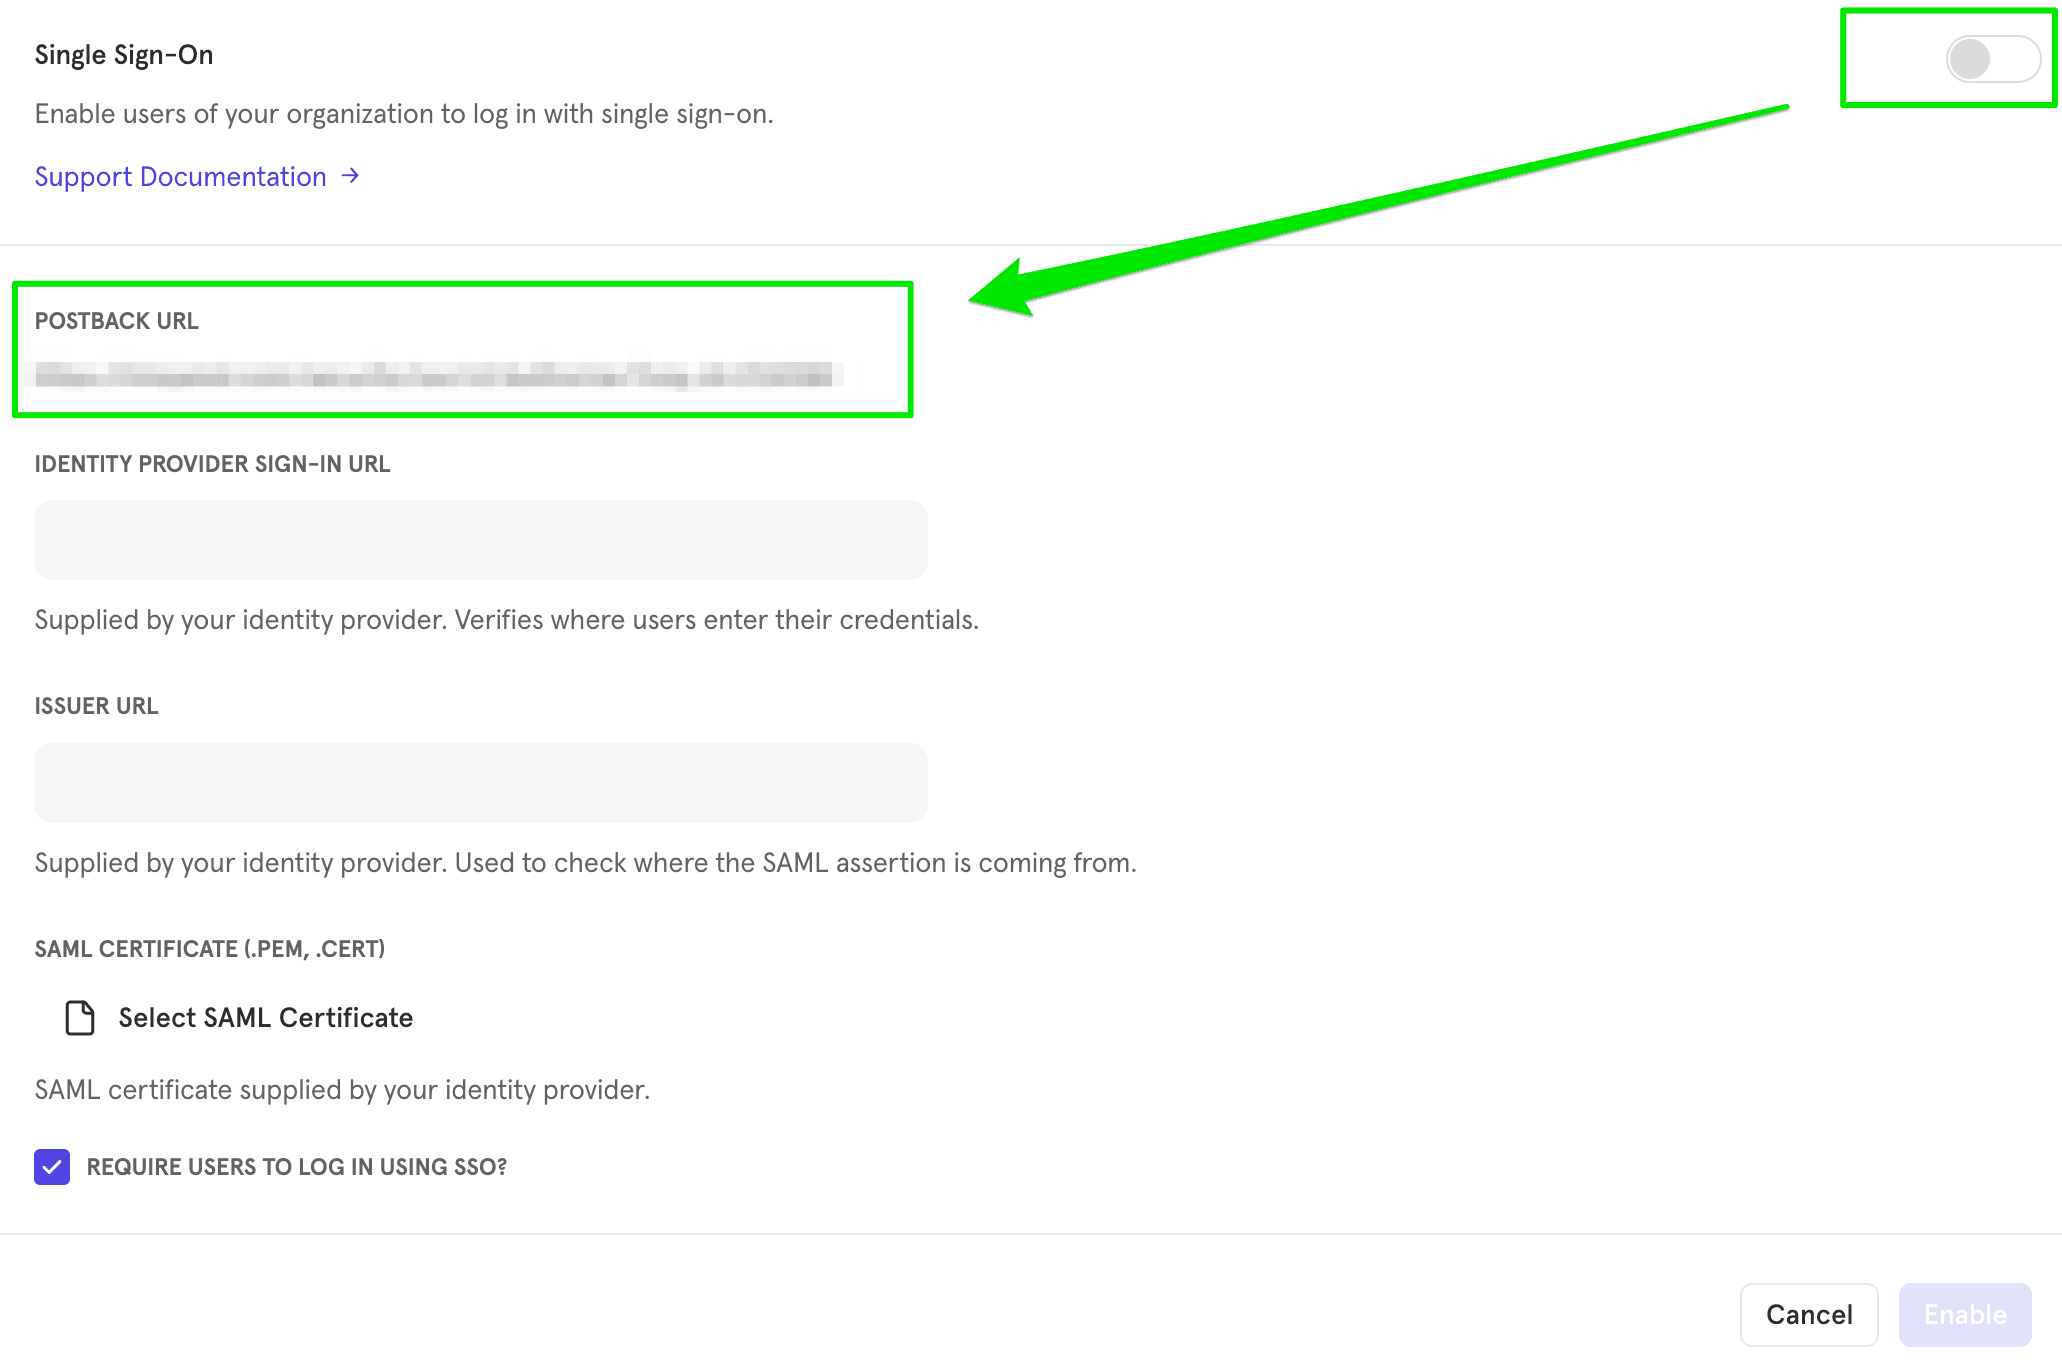
You likely will need to provide your IDP with a postback URL. The postback URL is accessible from the Access Security tab. To obtain your postback URL, navigate to Access Security in your Organization Settings and toggle the Single Sign-On button.
SAML Certificate
This needs to be a .cert or .pem file for a valid X509 certificate. Note that .xml files are not valid, if you have downloaded one from your IDP it will not work. Also it's important to note that this certificate will expire after some number of years. At the moment we do not send any notifications when it is about to expire, so make sure you have a system set up to cycle them every so often if you wish to avoid disruption.
Just in Time Provisioning
Just in Time (JIT) provisioning using SAML will let users sign in automatically upon the initial login event. This removes the need for organization admin to invite individual users to an Organization. This is part of what IDP Managed Access provides.
You must complete the steps above to enable JIT provisioning.
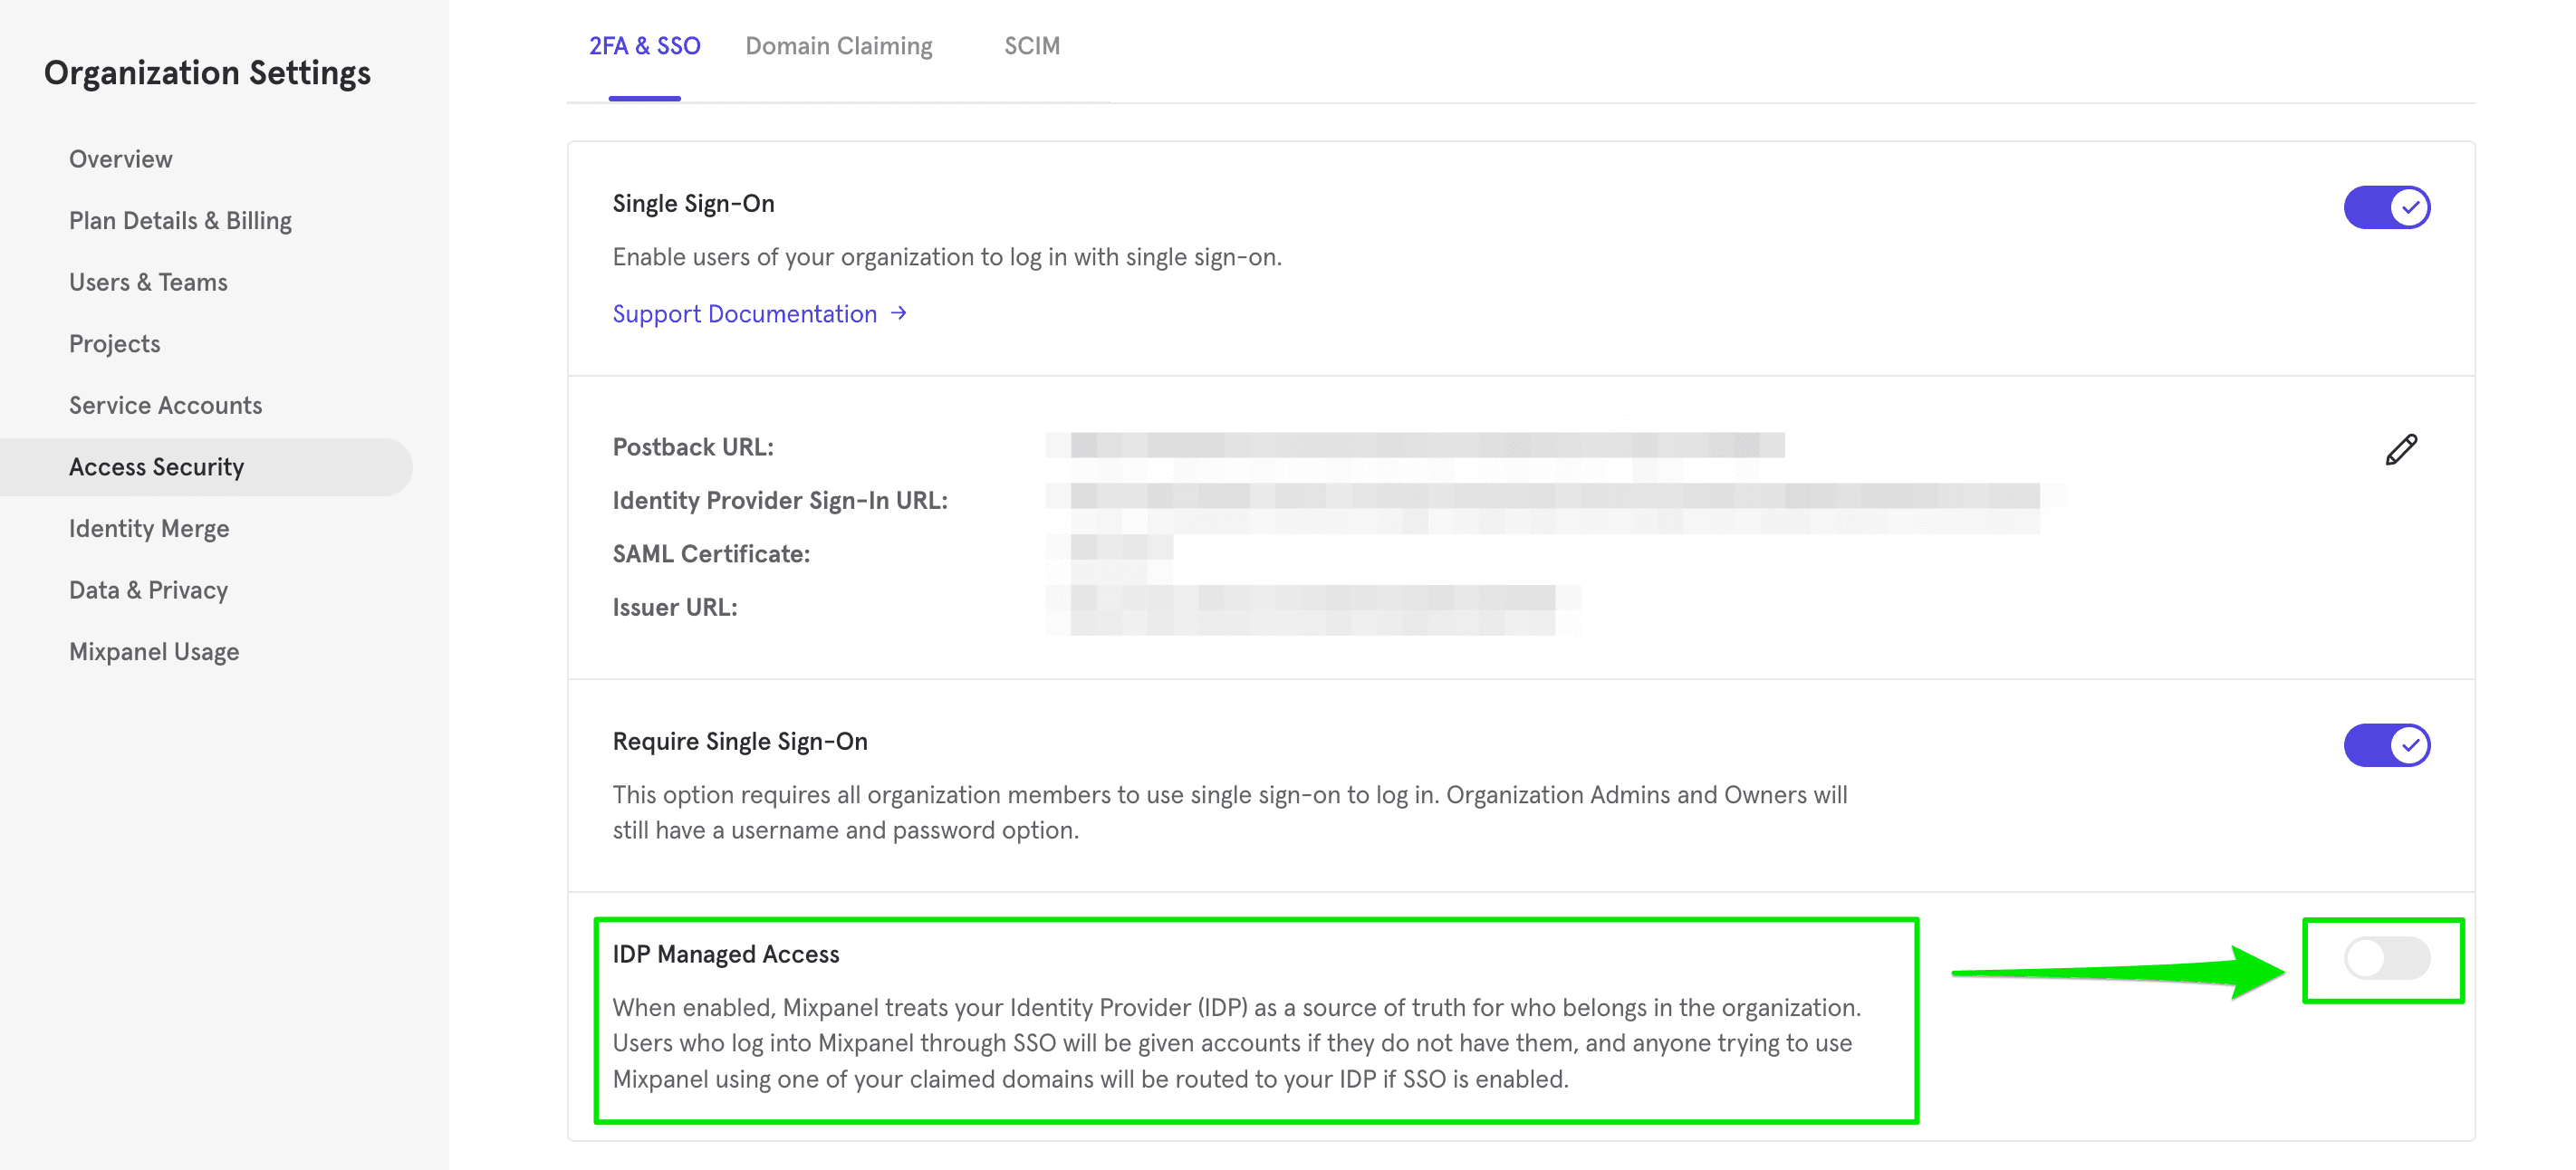
To turn on JIT provisioning, go to Access Security, and click on the “IDP Managed Access” toggle. The toggle will be blue if it is enabled.
Users added in this way will have first names and last names populated by the firstName and lastName profile attributes provided via SAML at login time. They will also have no roles to start off except those given to all users in your organization. To give these provisioned users default access to projects, invite All Users in the Organization to the project.
IDP Managed Access
This toggle is to determine whether you are using your IDP to manage who should be allowed in the organization or whether you are using it purely as an authentication method and want to leave the management within Mixpanel. If it is enabled all users of your verified claimed domains who log into Mixpanel (whether they are in your org or not) will be prompted to use SSO. If they successfully log in through your SSO set up they will be automatically added to the organization with no permissions except those granted to all users. It will also redirect anyone trying to sign up for a Mixpanel account with your claimed domain or anyone requesting access to a project in your organization to sign in via SSO first. This helps ensure all users in your organization who try to use Mixpanel get routed to your IDP, where you can them assign them access to the Mixpanel app. This also prevents needing to manually invite users to Mixpanel from within the product. We recommend this to be toggled on for most customers.
This can be enabled in the Access Security tab of your Organization Settings. It is the toggle at the bottom called "IDP Managed Access" and is blue when enabled.
SCIM
The SCIM tab in the Access Security tab of the Organization Settings lets you generate a token used to hit the SCIM endpoints. Remember to save this token, as you will only see it once. Note that only accounts with enterprise plans have access to SCIM at the moment.
You can find the official SCIM spec subset that Mixpanel implements here (opens in a new tab). The base endpoint is https://mixpanel.com/api/app/scim/v2 (opens in a new tab) which you can hit using the SCIM token as an Authentication Bearer token. For instance a GET call on https://mixpanel.com/api/app/scim/v2/Users (opens in a new tab) using the SCIM token will get you a list of all users in your organization. Note that the SCIM endpoint only affects users who's email has a domain in the list of your verified claimed domains.

While you can hit the SCIM endpoints directly, the most common use case would to be use it for autoprovisioning within an IDP that has an integration with Mixpanel provisioning. This will let your IDP and Mixpanel stay in sync - when you assign users to Mixpanel in your IDP they will be provisioned in Mixpanel, and optionally you can deprovision users within Mixpanel who lose access in your IDP. IDPs that currently have an autoprovisioning integration with Mixpanel are Okta, Onelogin, and Azure.
If you wish to revoke your SCIM Provisioning token, you can generate a new one which will kill the previous token.
Was this page useful?