Managing Projects
Creating Projects
Your first project will be created automatically when you create an Organization in Mixpanel. You can create additional projects as follows -- we recommend creating a Development project to test any tracking changes before pushing them to production.
To create a new Mixpanel project:
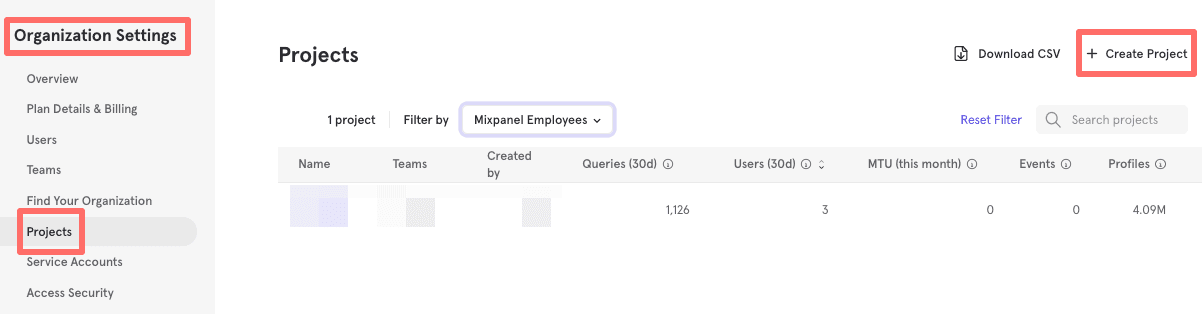
- In Organization Settings, click Projects at the left-side menu.
- Click Create Project. A popup will appear.
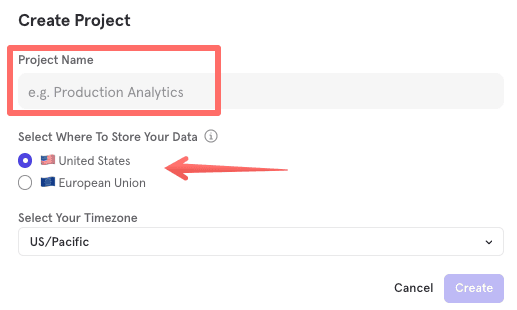
- Enter a name for the project and click Create Project.
- Choose the residency of your data. ATTENTION! This can't be changed once the project is created.
- Choose the timezone of your project.
- Click on "Create"
- The new project will appear now in the list of projects.
IMPORTANT! The data residency of a project can't be changed once the project is created.
Viewing Project Information
To view project information:
- In Organization Settings, click Projects.
- Click a project. You’ll see information about project details, usage statistics, and access keys.
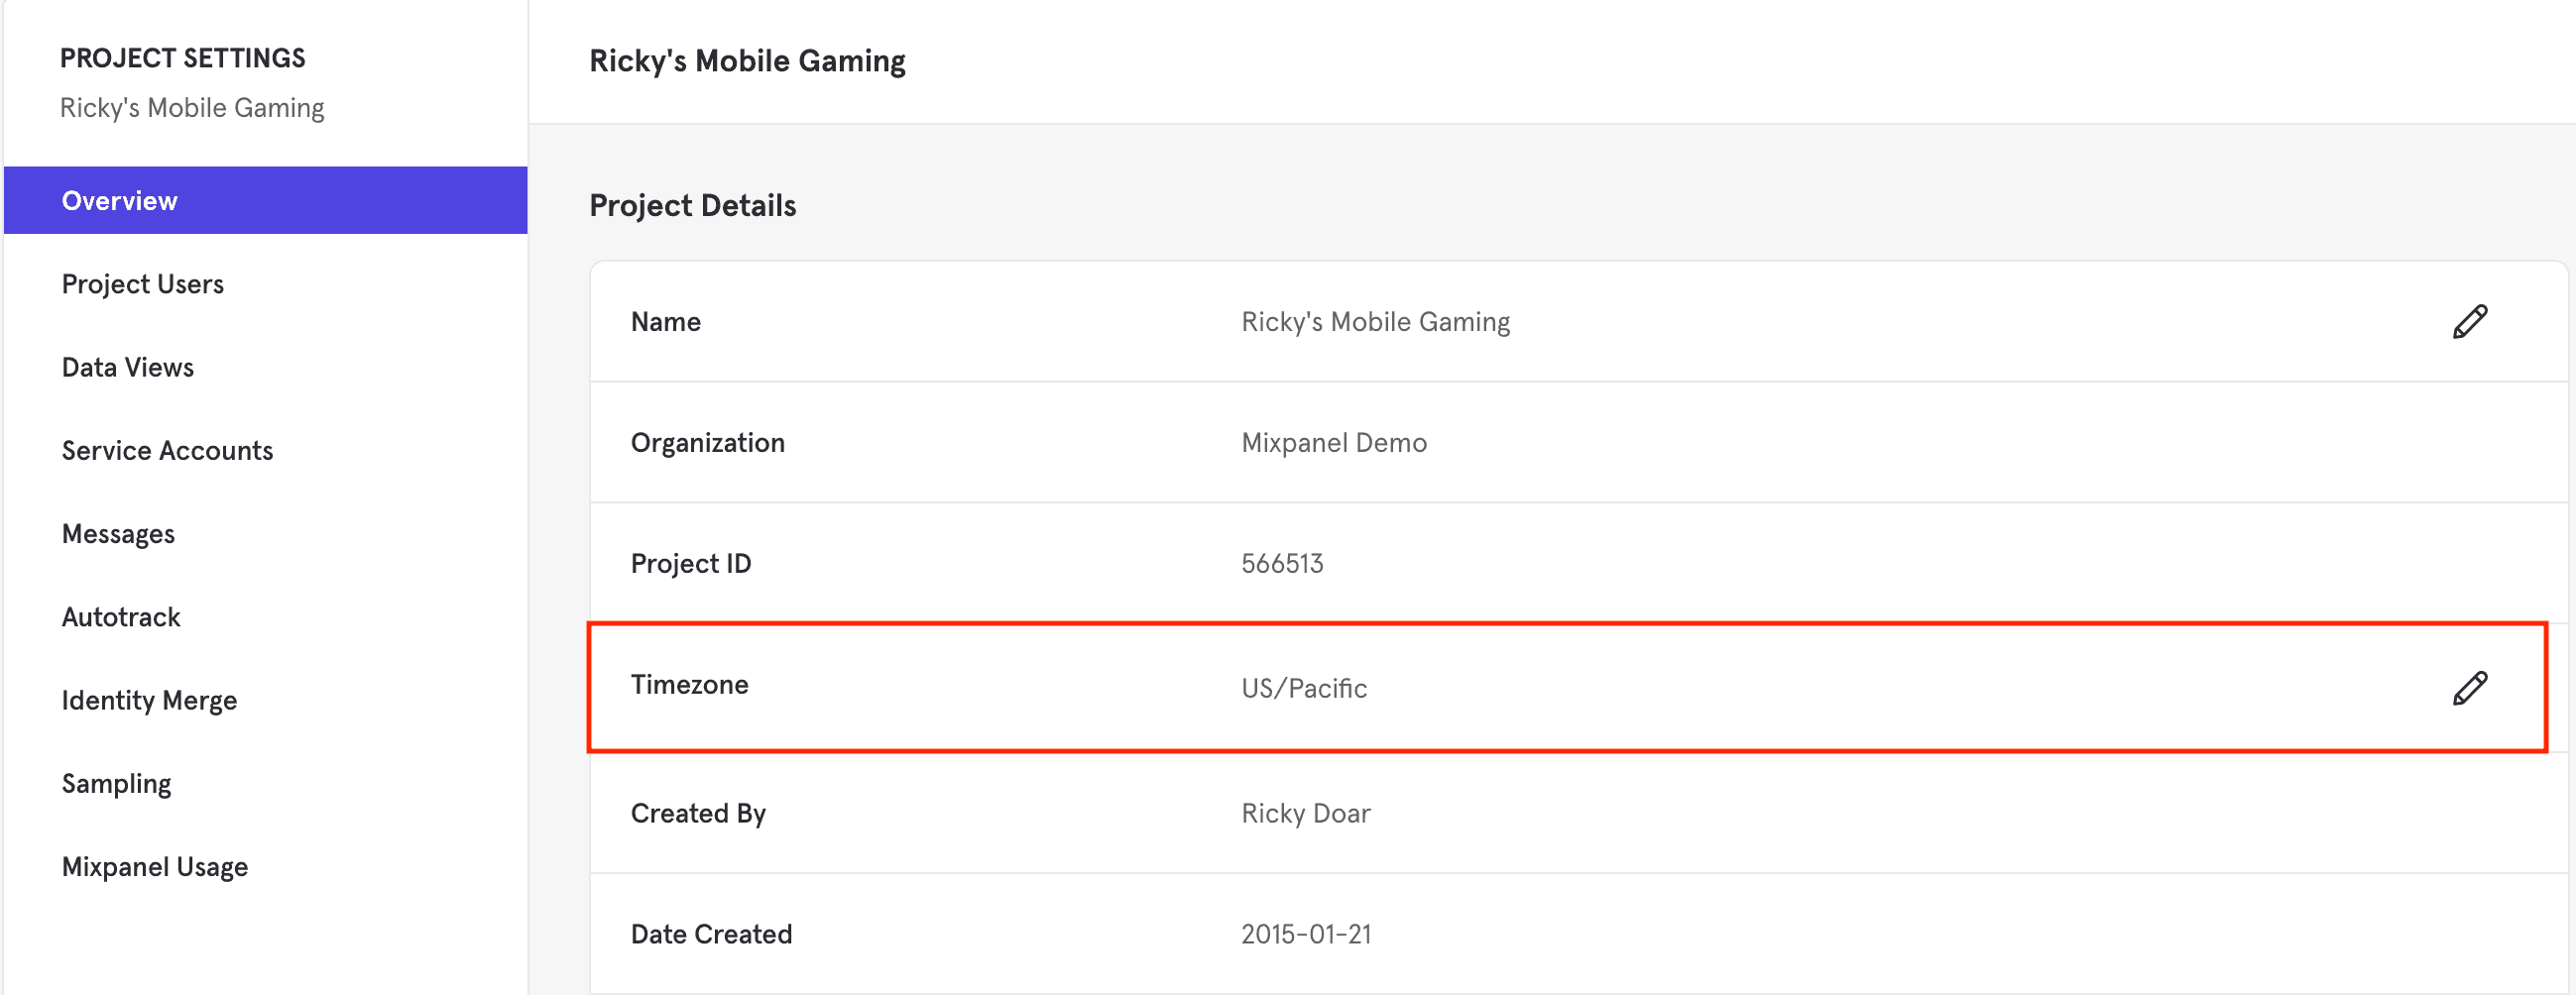
Project Details
You can edit the name of the project and its time zone. To edit, click the Pencil icon in the "Name" and "Timezone" fields.
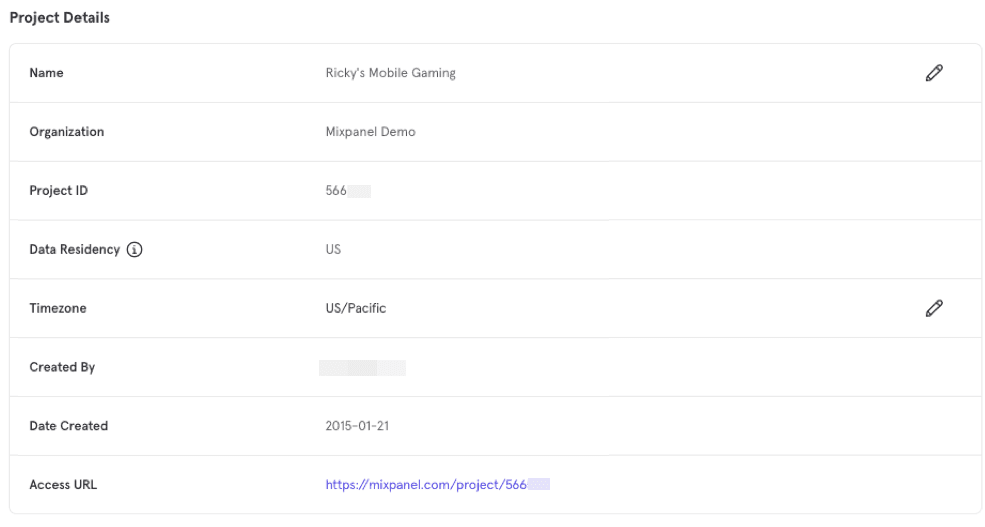
This table describes the type of details Mixpanel provides for your project.
| Fields | Description |
|---|---|
| Organization | The name of the organization where the project is. |
| Project ID | The ID number of the project. |
| Data Residency | Where the data centers hosting the data pool of this project are located. |
| Timezone | The time zone you assign the project. |
| Created By | The name of the user who created the project. |
| Date Created | The date when the project was created. |
| Access URL | The URL where you can access the project. |
Access Keys
This table provides the values for the project token and the API secret. The token is necessary when setting up your tracking.

Reset Projects
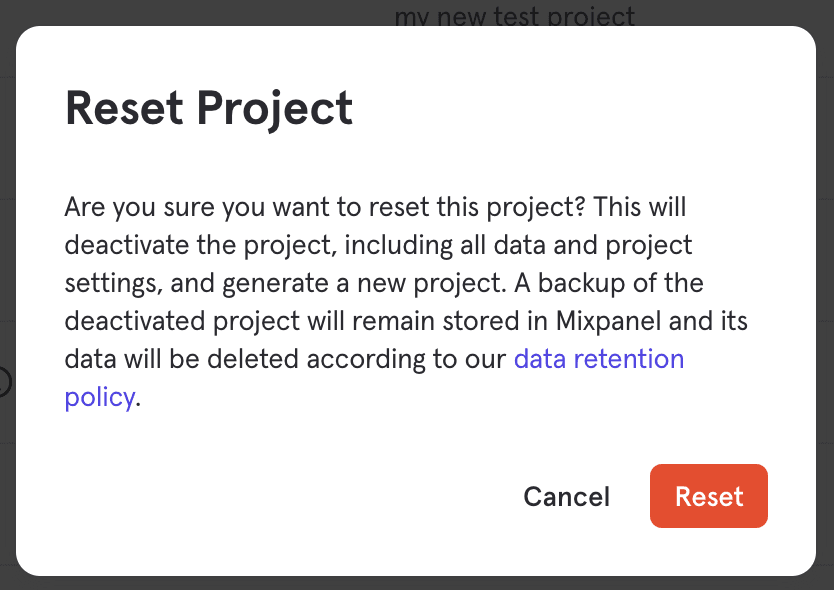
You can reset the current project in Project Settings. When you reset the project, Mixpanel deactivates the project and all its data and settings, and then generates a new project.
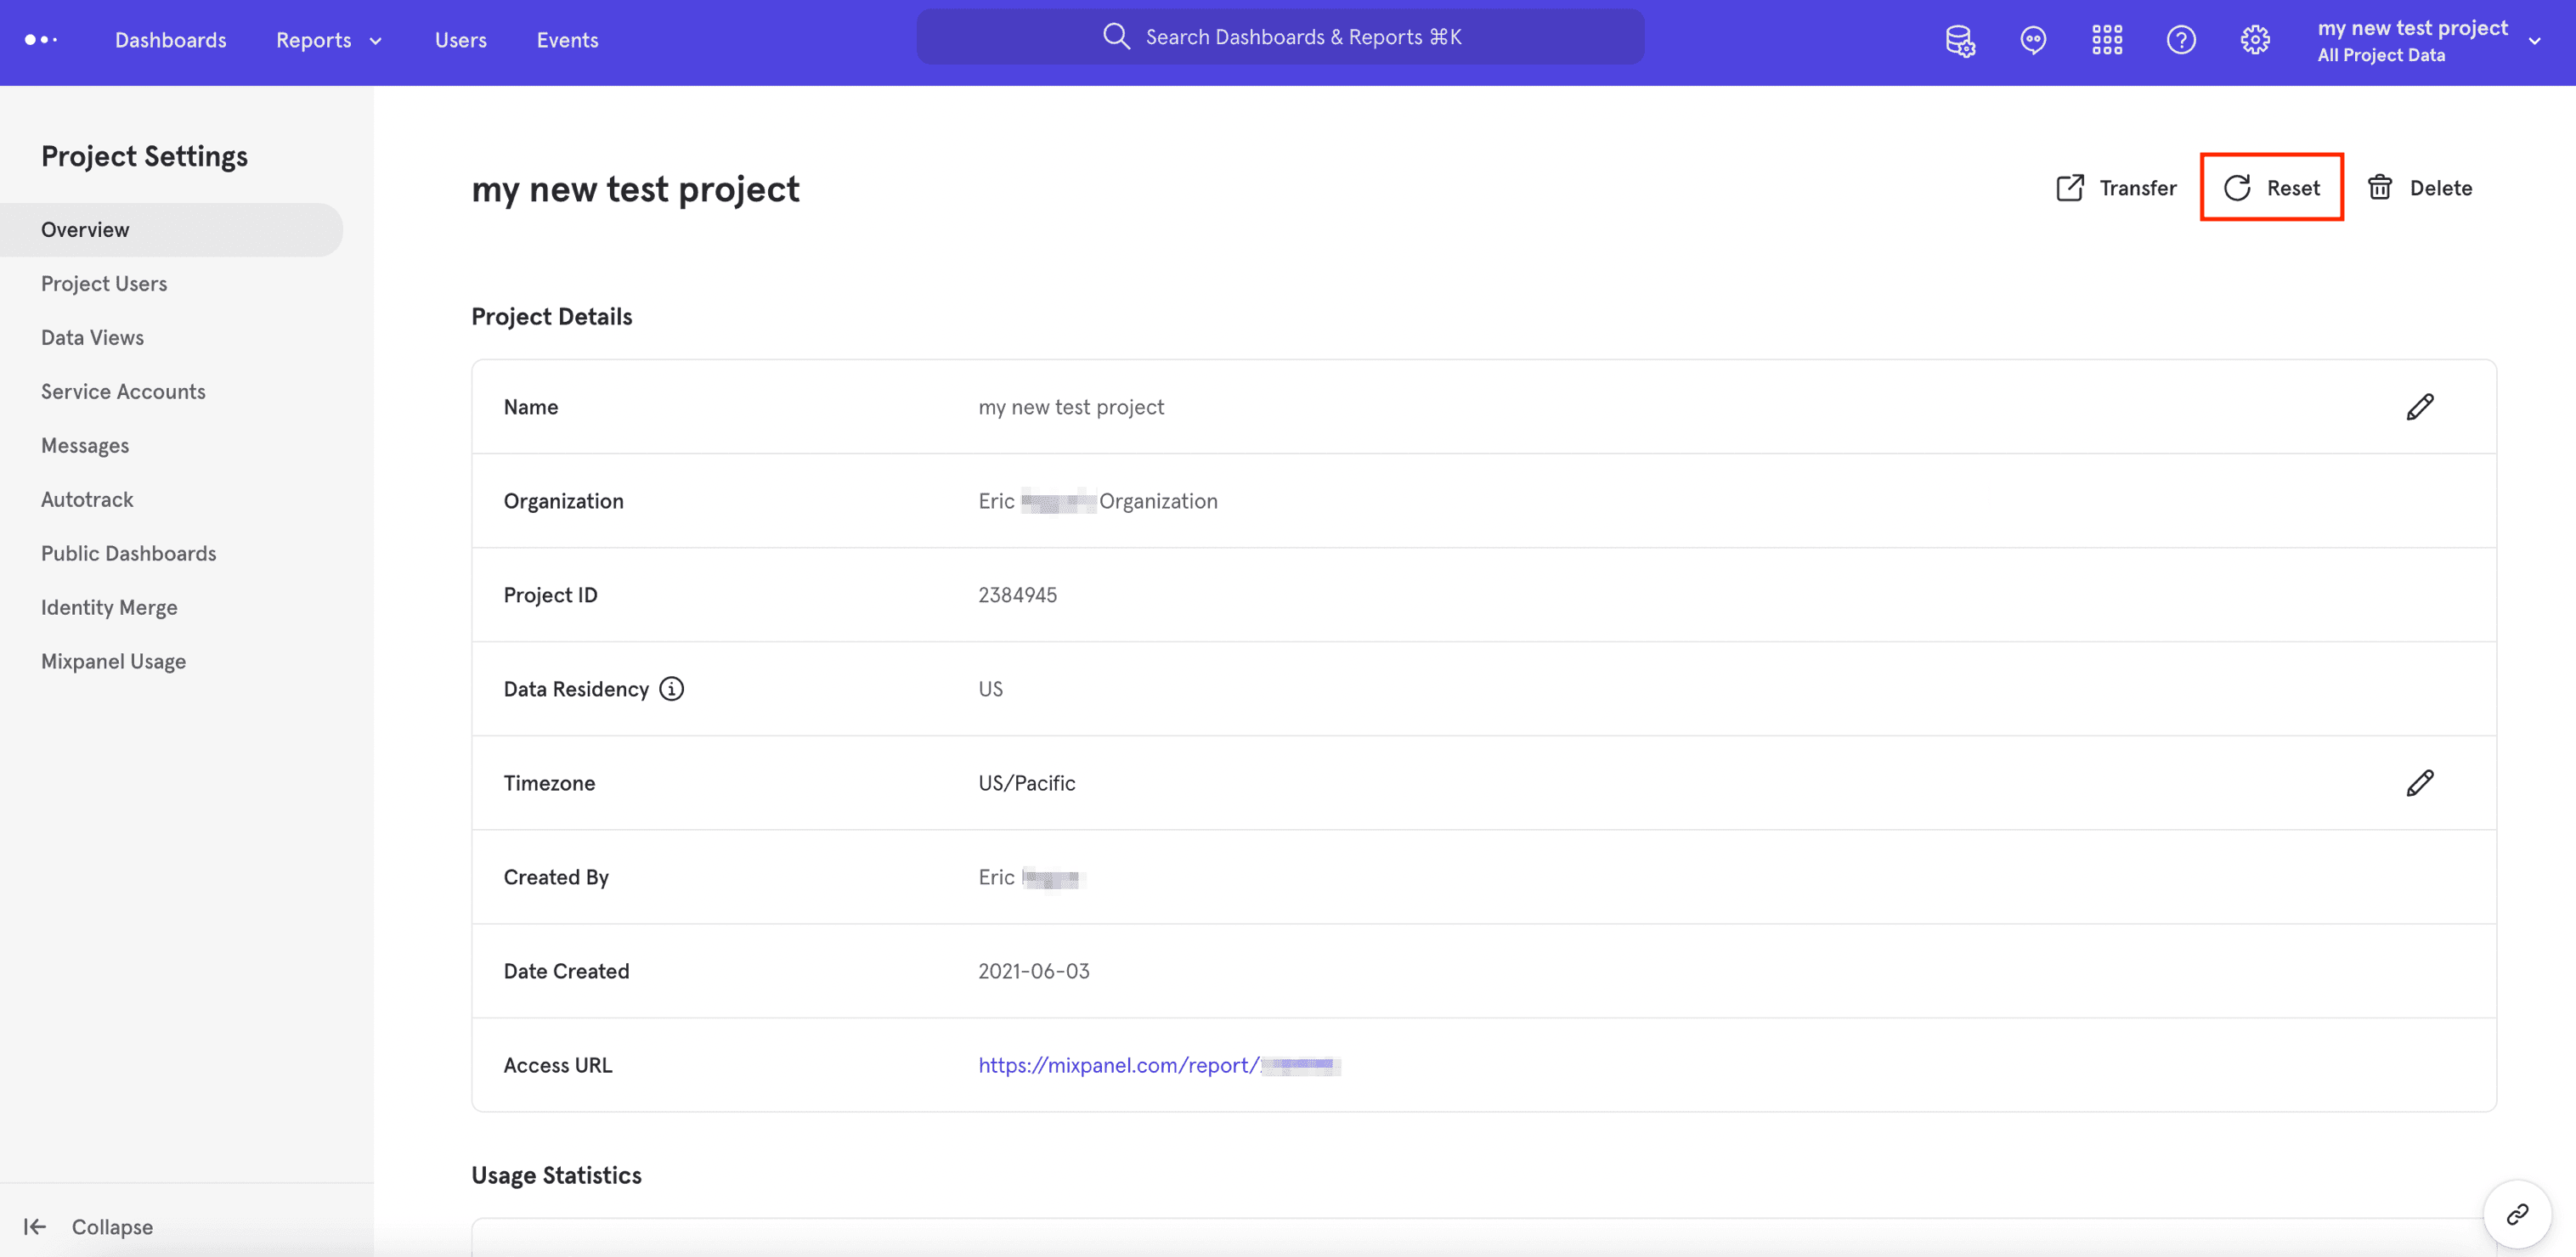
A warning indicates this reset deactivates the project and all its data and project settings, then generates a new project. Mixpanel stores a backup of the deactivated project. Mixpanel will delete the data based on the data retention policy.
Delete Projects
To delete a project:
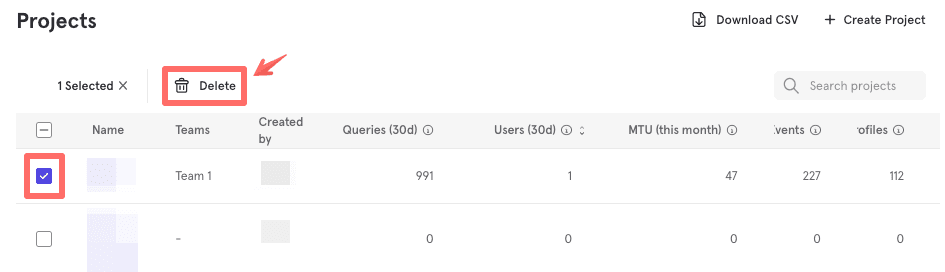
- In Organization Settings, click Projects.
- Select the project you want to delete.
- Above the “Project Details” section, click Delete Project. A delete box appears and indicates you won’t be able to access the project in the Mixpanel interface or API. Mixpanel will store a backup of the deleted project and will delete the data based on the data retention policy.
- Click Delete Project to remove the project.
Find Your Project Tokens
Each Mixpanel account can contain multiple projects. Each project has its own unique routing number, which we call a project token. Whenever you want to send data to a specific project, you'll need to specify the project token so we know where to put the data.
Locate Current Project Token
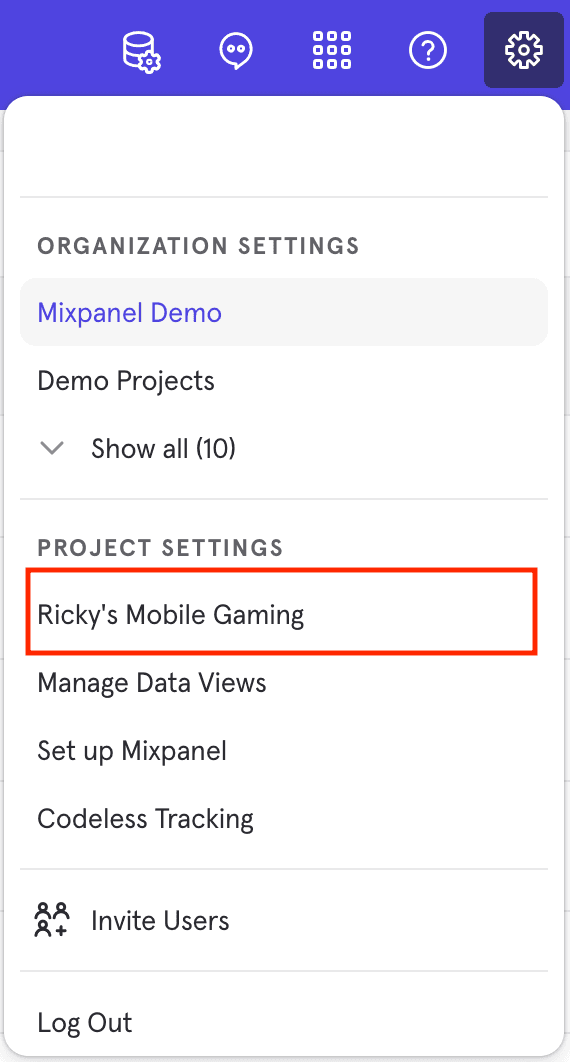
Click the Settings gear in the upper right-hand corner of your Mixpanel project and select Project settings to see your Project Token under the Access Keys table.
Locate Tokens for All Projects in Your Mixpanel Account
To view the project tokens for all your projects, click the Settings gear icon in the top right of Mixpanel and select Personal Settings.
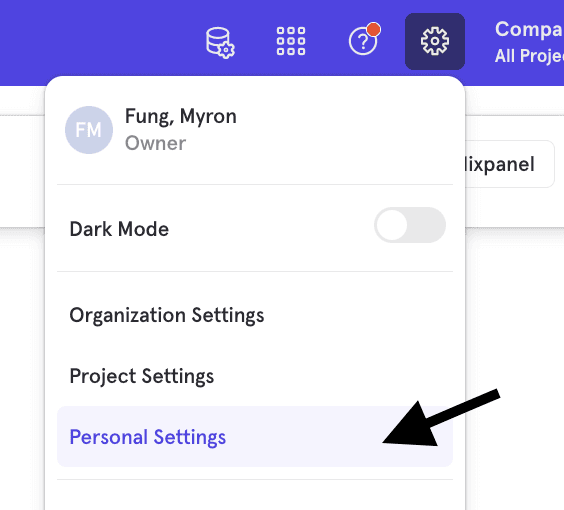
Then select the Projects tab.

Manage Timezones for Projects
Mixpanel records all events in Coordinated Universal Time (UTC) (opens in a new tab) at intake.
Mixpanel converts the timezone to your project timezone before writing the event to Mixpanel data stores. Mixpanel sets project timezones by city or region. If a city or region observes Daylight Savings Time, the ingestion offset adjusts appropriately.
Note: As of 11 Jan 2023, all new projects store their data in UTC. Changing the timezone for any project under Project Settings only affects the timezone in which Mixpanel outputs results. You will no longer see a gap or spike in events after changing the timezone.
Changing your Timezone
By default, Mixpanel sets your timezone to UTC.
Only project owners and admins can change project settings.
To change the project’s timezone:
- In Project Settings, select the project.
-
- In Overview, select the pencil icon in the Timezone field to display a list of timezones.
- Select a timezone and click Save.
Note that changing the timezone will not affect any data, it only affects the timezone in which we output results.
Understanding How Timezones Affect Data
After you set your timezone correctly, you should send any dates or times to Mixpanel as Coordinated Universal Time (UTC).
By default, Mixpanel’s integration libraries work with API ingestion endpoints to automatically convert the UTC timestamp or date to your project timezone before storing your data.
If you overwrite the default timestamp, import old data, or set a property that is in date format (e.g. Account Created Date), be sure to send the timestamp or date in UTC.
Sending Date Properties to Mixpanel
As mentioned previously, you should send date properties to Mixpanel as UTC. Date properties are one of the five data types Mixpanel accepts.
For this type of property, Mixpanel recommends an iso-formatted date string (YYYY-MM-DDTHH:mm:ss) to use in your Mixpanel reports.
Below are some code examples from Mixpanel's client-side libraries that allow you to send a property to Mixpanel with a correctly formatted UTC timestamp.
Javascript: new Date().toISOString()
mixpanel.track("Sign Up", {"Account Created Date": new
Date().toISOString()});
iOS: [NSDate date]
NSDate *today = [NSDate date];
[mixpanel.people set:@{@"Account Created Date": @today}];
Android: dateFormat.format(new Date())
final DateFormat dateFormat = new
SimpleDateFormat("yyyy-MM-dd'T'HH:mm:ss", Locale.US);
dateFormat.setTimeZone(TimeZone.getTimeZone("UTC"));
JSONObject props = new JSONObject();
try {
props.put("time-example", dateFormat.format(new Date()));
} catch (Exception e) {
}
Mixpanel.track("Account Created Date", props);
Exporting Data from Mixpanel
When you’re exporting raw data from Mixpanel, your request requires the date parameters "from_date" and "to_date" to determine which date range of data to return.
Mixpanel's raw export machines interpret the "from_date" and "to_date" values to your project’s timezone. As a result, if you request a single day of data, you receive one full day in your project’s timezone, not one full day in UTC.
As mentioned earlier, Mixpanel hardcodes event timestamps to your project’s timezone. However, the "$time" property from a raw export returns with a Unix timestamp, not a UTC timestamp.
The Unix timestamp represents the number of seconds that have elapsed since 00:00:00 on January 1, 1970 in your project’s timezone.
In the example below, if your project’s timezone is US/Pacific, the below parameters return:
00:00:00 Aug. 1 to 11:59:59 Aug. 1 PDT, or 07:00:00 Aug. 1 – 06:59:59 Aug. 2 UTC. from_date = "2015-08-01" to_date = "2015-08-01"Importing Data into Mixpanel
Always send imported data to Mixpanel in UTC to ensure it displays correctly in your project.
Mixpanel hardcodes timestamps of exported data to your project’s timezone. The exported data can be events and any date properties on events and users.
As a result, operations such as extract, transform, and load, need a quick timestamp and date property offset to reset the data back to UTC before importing it back to Mixpanel.
Transfer Project to Another Organization
Organization owners and project owners in a project can transfer that project to another organization to which they have permission.
When a user transfers a project to another organization, the project members and service accounts don't transfer with the project. As a result, project members will lose access to the project if they aren't members of the target organization, and service accounts will need to be recreated.
To transfer a project to another organization:
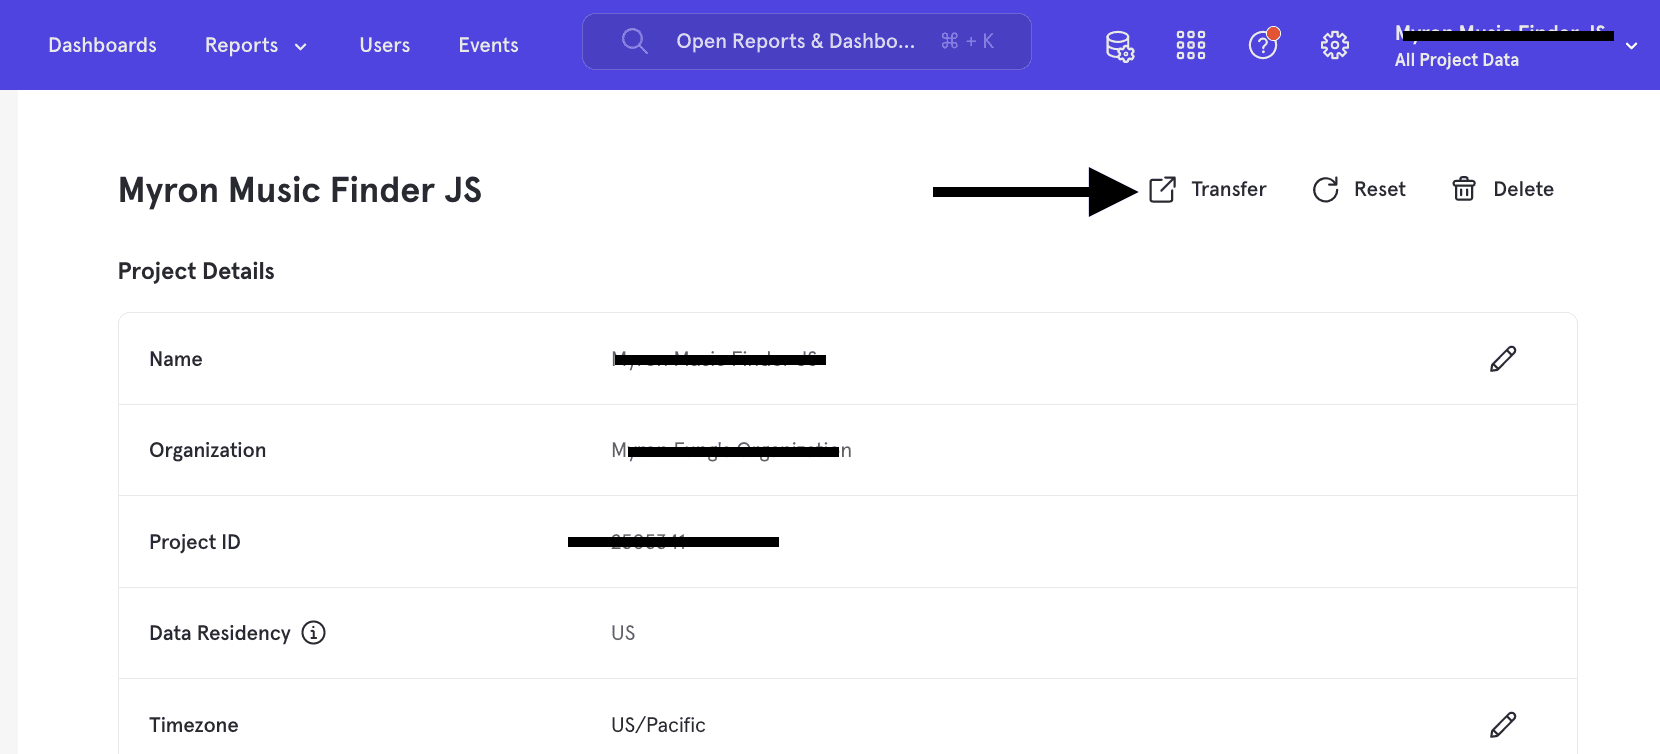
- Under Project Settings, click a project.
- Click Transfer.
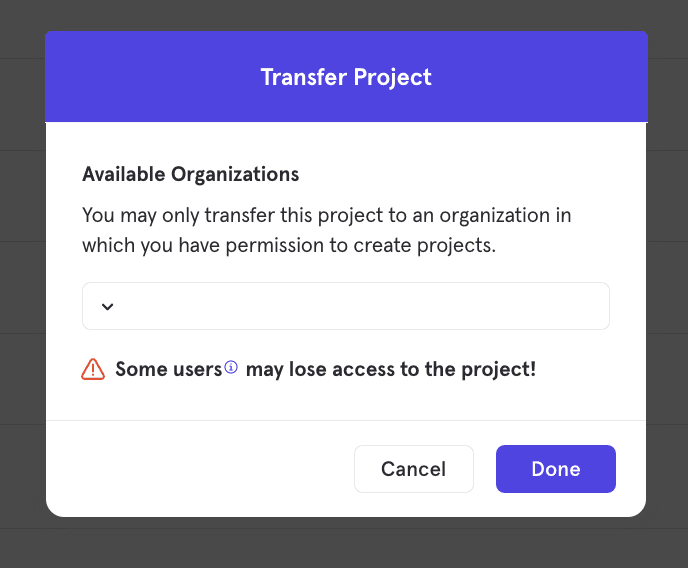
- The Transfer Project box appears. In the dropdown menu, select the organization where you want to transfer the project and click Done. You'll see a message that indicates the project has been transferred successfully.
Note that project tallies will be transferred along with your project to the new Organization.
Merge Or Combine Mixpanel Projects
If for any reason you need to combine two or more Mixpanel projects, it is possible to do so. Here are a few things to consider before proceeding with the merge to ensure you maintain data integrity:
-
If you're using the alias method, bear in mind that aliases are project-specific. As such, before importing data into the new project from the old project, you'd need to recreate the aliases from your old project. Mixpanel does not have the ability to provide a historical table of your project’s aliases.
-
Merging projects involves exporting and importing data, so to make sure you only have to go through the process once, ensure you have stopped sending data to the old project(s) before beginning to export.
How to Merge
To merge projects:
- Stop sending data to the old project(s).
- Begin sending all data to the new project.
- Once the old project has completely stopped receiving data, export that data via the raw data export API (opens in a new tab) and import the data into the new project via Mixpanel’s import API (opens in a new tab).
Additional Tips
-
When you export raw event data, the timestamps on those events will be in the timezone of your project.
-
Before importing into your new project, convert those timestamps to UTC so that they are correctly transformed to the timezone of the new project.
-
Read more about timezones and how Mixpanel handles time here (opens in a new tab).
Was this page useful?